Localhost and the Web Root Directory
The Apache web server comes with a default configuration that is suitable for immediately publishing a web site, with no special modifications.
We have seen in the previous section, that when we visit “localhost”, or the equivalent IP address 127.0.0.1 on a web browser, we see the default web page provided by Apache with the famous and reassuring “It Works!” message.
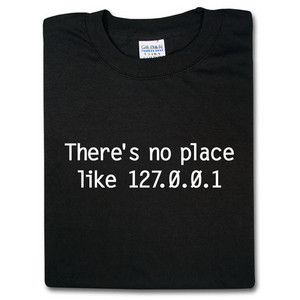
A note about the 127.0.0.1 IP address and localhost. This is also known as the server “Home”. These terms are familiar to geeks, as you can see in the geek t-shirt represented in the figure below.
Let’s come back to the Apache default home page. This page is a plain html page, that is a normal text file that can be edited with any text editor (more on text editors in the next chapter) including for example the nano shell editor that was discussed in section 2-3. This text file, whose file name ends with a “.html” extension, is located on your Linux server and was created by the installer at the time of Apache installation.
The full name of this file is “index.html”. This is a file name you will become very familiar with. More on this in a moment.
When you visit localhost, the index.html file is loaded to the browser. The browser interprets the html code of the file, looking for example for parts of text that should be formatted and rendered in a particular way, graphically and for images to be included in the page. The browser then shows you a nicely formatted page.
In the default Apache page for instance, the “It Works!” part is rendered in bold and is on a line of it’s own with respect to the rest of the text in the page, as shown in figure 2-5-2 of the previous section.
How text formatting and page layouts can be achieved by using the HTML markup language will be discussed in depth in the next chapter.
Instead, we will now focus on our index.html as a file of the computer. Where is this index.html file, show by default on visiting the server’s Home/localhost/127.0.0.1, located in the Linux filesystem?
Editing Apache configuration files
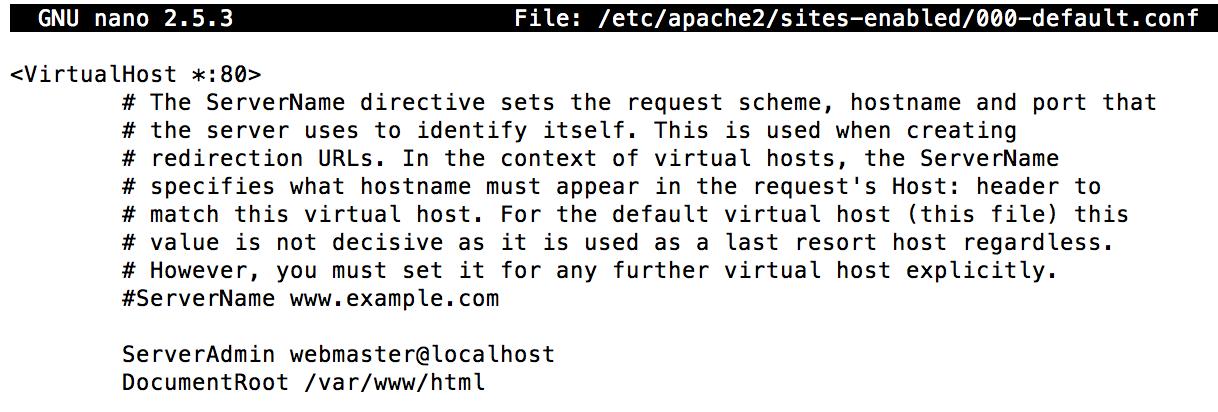
The index.html is located in a special directory of the filesystem called the Web Root or Document Root. The path of the web root directory is specified in one of the Apache configuration files, located at:
/etc/apache2/sites-enabled/000-default
After installing Apache you can view the contents of this file on your system by running:
cat /etc/apache2/sites-enabled/000-default.conf
In recent versions of Apache, the default web root directory, that contains the index.html file, is as follows:
/var/www/html
The path was /var/www in older versions of Apache.
so the index.html file’s path is:
/var/www/html/index.html
If we wanted to, we could change the web root directory by editing the configuration file. We need to use the sudo command and edit the file as root, as Apache configuration files belong to root. Therefore, as a normal user, you will not have permission to edit the configuration files.
andrea@ubuntu:~$ sudo nano -w /etc/apache2/sites-enabled/000-default.conf
We could then change the DocumentRoot’s directory path, save the file with Ctrl + o, exit nano with Ctrl + x, restart the Apache web server so as to re-load the edited configuration file and get the modification to work:
andrea@ubuntu:~$ sudo service apache2 restart
or
andrea@ubuntu:~$ /etc/init.d/apache2 restart
However there is no special need to change the default DocumentRoot path, the default directory /var/www/html is just fine for our purposes.
Using the UserDir Apache module to enable individual web development accounts for server’s users
We would now like to turn our web server in the course’s web server, where students can each have an account that they can use to practice their Bioinformatics web development skills and then, at the end of the course, build their own Bioinformatics web application.
An account for each student can easily be created with the “adduser” shell command that was already discussed in a previous section.
We then have to enable the so called “userdir” directories Apache functionality, so that each user will automatically be able to publish web contents at a public address. Each user will have a personal folder that will act as it’s personal “Document Root” directory.
We will configure Apache so that each user will have a public web address accessible at web URL of this kind:
http://web-server-ip/~username
Please note the tilde ~ that precedes the username and indeed needs to be included in the URL for the address to work.
The Document Root of each user will be a directory named:
public_html
located in each user’s home directory, at /home/username/public_html
Everything in this directory will be visible at the URL given above, for each user.
Here’s the full procedure to enable this setup:
We call the “a2enmod” shell command (Apache2 Enable Module) with the name of the module we want to activate as an argument. We need to activate the “userdir” Apache module.
andrea@ubuntu:~$ sudo a2enmod userdir
Please note that disabling Apache2 modules is done instead with the “a2dismod” shell command.
Create the public_html web directories in the user directories. Each user may create it’s own by going to his home directory with:
username@ubuntu:~$ cd
and then typing:
username@ubuntu:~$ mkdir public_html
Restart apache:
andrea@ubuntu:~$ sudo service apache2 restart
The public_html directories can now be visited with the browser at:
http://web-server-ip/~username
In order for this to work, however, make sure that the users directories (/home/username) have a 755 permission, otherwise you may get a Forbidden message on trying to visit the users personal web directories at the address above because Apache will be unable to read/search into them so as to reach the public_html directories.
Enabling PHP for users web directories
Still a little more configuration editing in order to enable the execution of PHP scripts in the user’s public_html directories.
First run the following command to check out the name of the current php conf file.
andrea@ubuntu:~$ ls /etc/apache2/mods-enabled/ | grep php
You may get an output like this:
php7.0.conf
php7.0.load
We are interested in the file that ends in .conf, in this case this would be php7.0.conf.
Let’s edit this file:
andrea@ubuntu:~$ sudo nano -w /etc/apache2/mods-enabled/php7.0.conf
As PHP in user directories is disabled by default, we need to enable this feature by commenting or deleting the following part of the file:
<ifModule mod_userdir.c>
<Directory /home/*/public_html>
php_admin_value engine Off
</Directory>
</ifModule>
Commenting means adding a # before each line we wish to “inactivate”. The commented version of the code above would be:
#<ifModule mod_userdir.c>
# <Directory /home/*/public_html>
# php_admin_value engine Off
# </Directory>
#</ifModule>
As usual, save the file (ctrl + o) and exit nano (ctrl + x).
We can now restart the Apache web server so that the configuration files are reloaded and the modifications can become effective:
andrea@ubuntu:~$ sudo service apache2 restart
Testing the setup
Each user can now create an index.php file in his public_html directory:
andrea@ubuntu:~$ nano -w /home/username/public_html/index.php
write something inside:
|
1 2 3 4 5 6 7 |
<?php echo "Just testing!"; ?> |
save the file with Ctrl + o, exit nano with Ctrl + x
The result can be seen by visiting the user’s home URL at:
http://web-server-ip/~username
or, if working locally:
http://localhost/~username
If you have installed Linux on a machine that you will use exclusively, for example your laptop, there is no need to activate the userdir module. You can work directly at DocumentRoot, in the /var/www/html folder (being the system administrator comes with some privileges). in this case we invite you, as a first exercise, to edit the default Apache index.html file:
andrea@ubuntu:~$ sudo nano -w /var/www/html/index.html
If you followed us up to this point and succeeded in having your first index.html page online, we expect you to post a success message below to let us know!
Having published online the first Hello World message is great, however a few more things need to be learned in order to build a nice web page or maybe a full website. We will learn all the relevant skills in the next chapter: Your first webpage, Learning HTML and CSS.
Chapter Sections
[pagelist include=”63″]
[siblings]