Keywords: LAN, intranet, SOHO router, private IP, public IP, router configuration, wireless configuration, wan port, embedded switch, bridging
In the preceding sections of this chapter we have discussed the basic notions about how the Internet works based on the TCP/IP family of protocols. In this section we will approach in practical terms the building of a small home or office Local Area Network (LAN or intranet) by using a SOHO router as the core network hardware device.
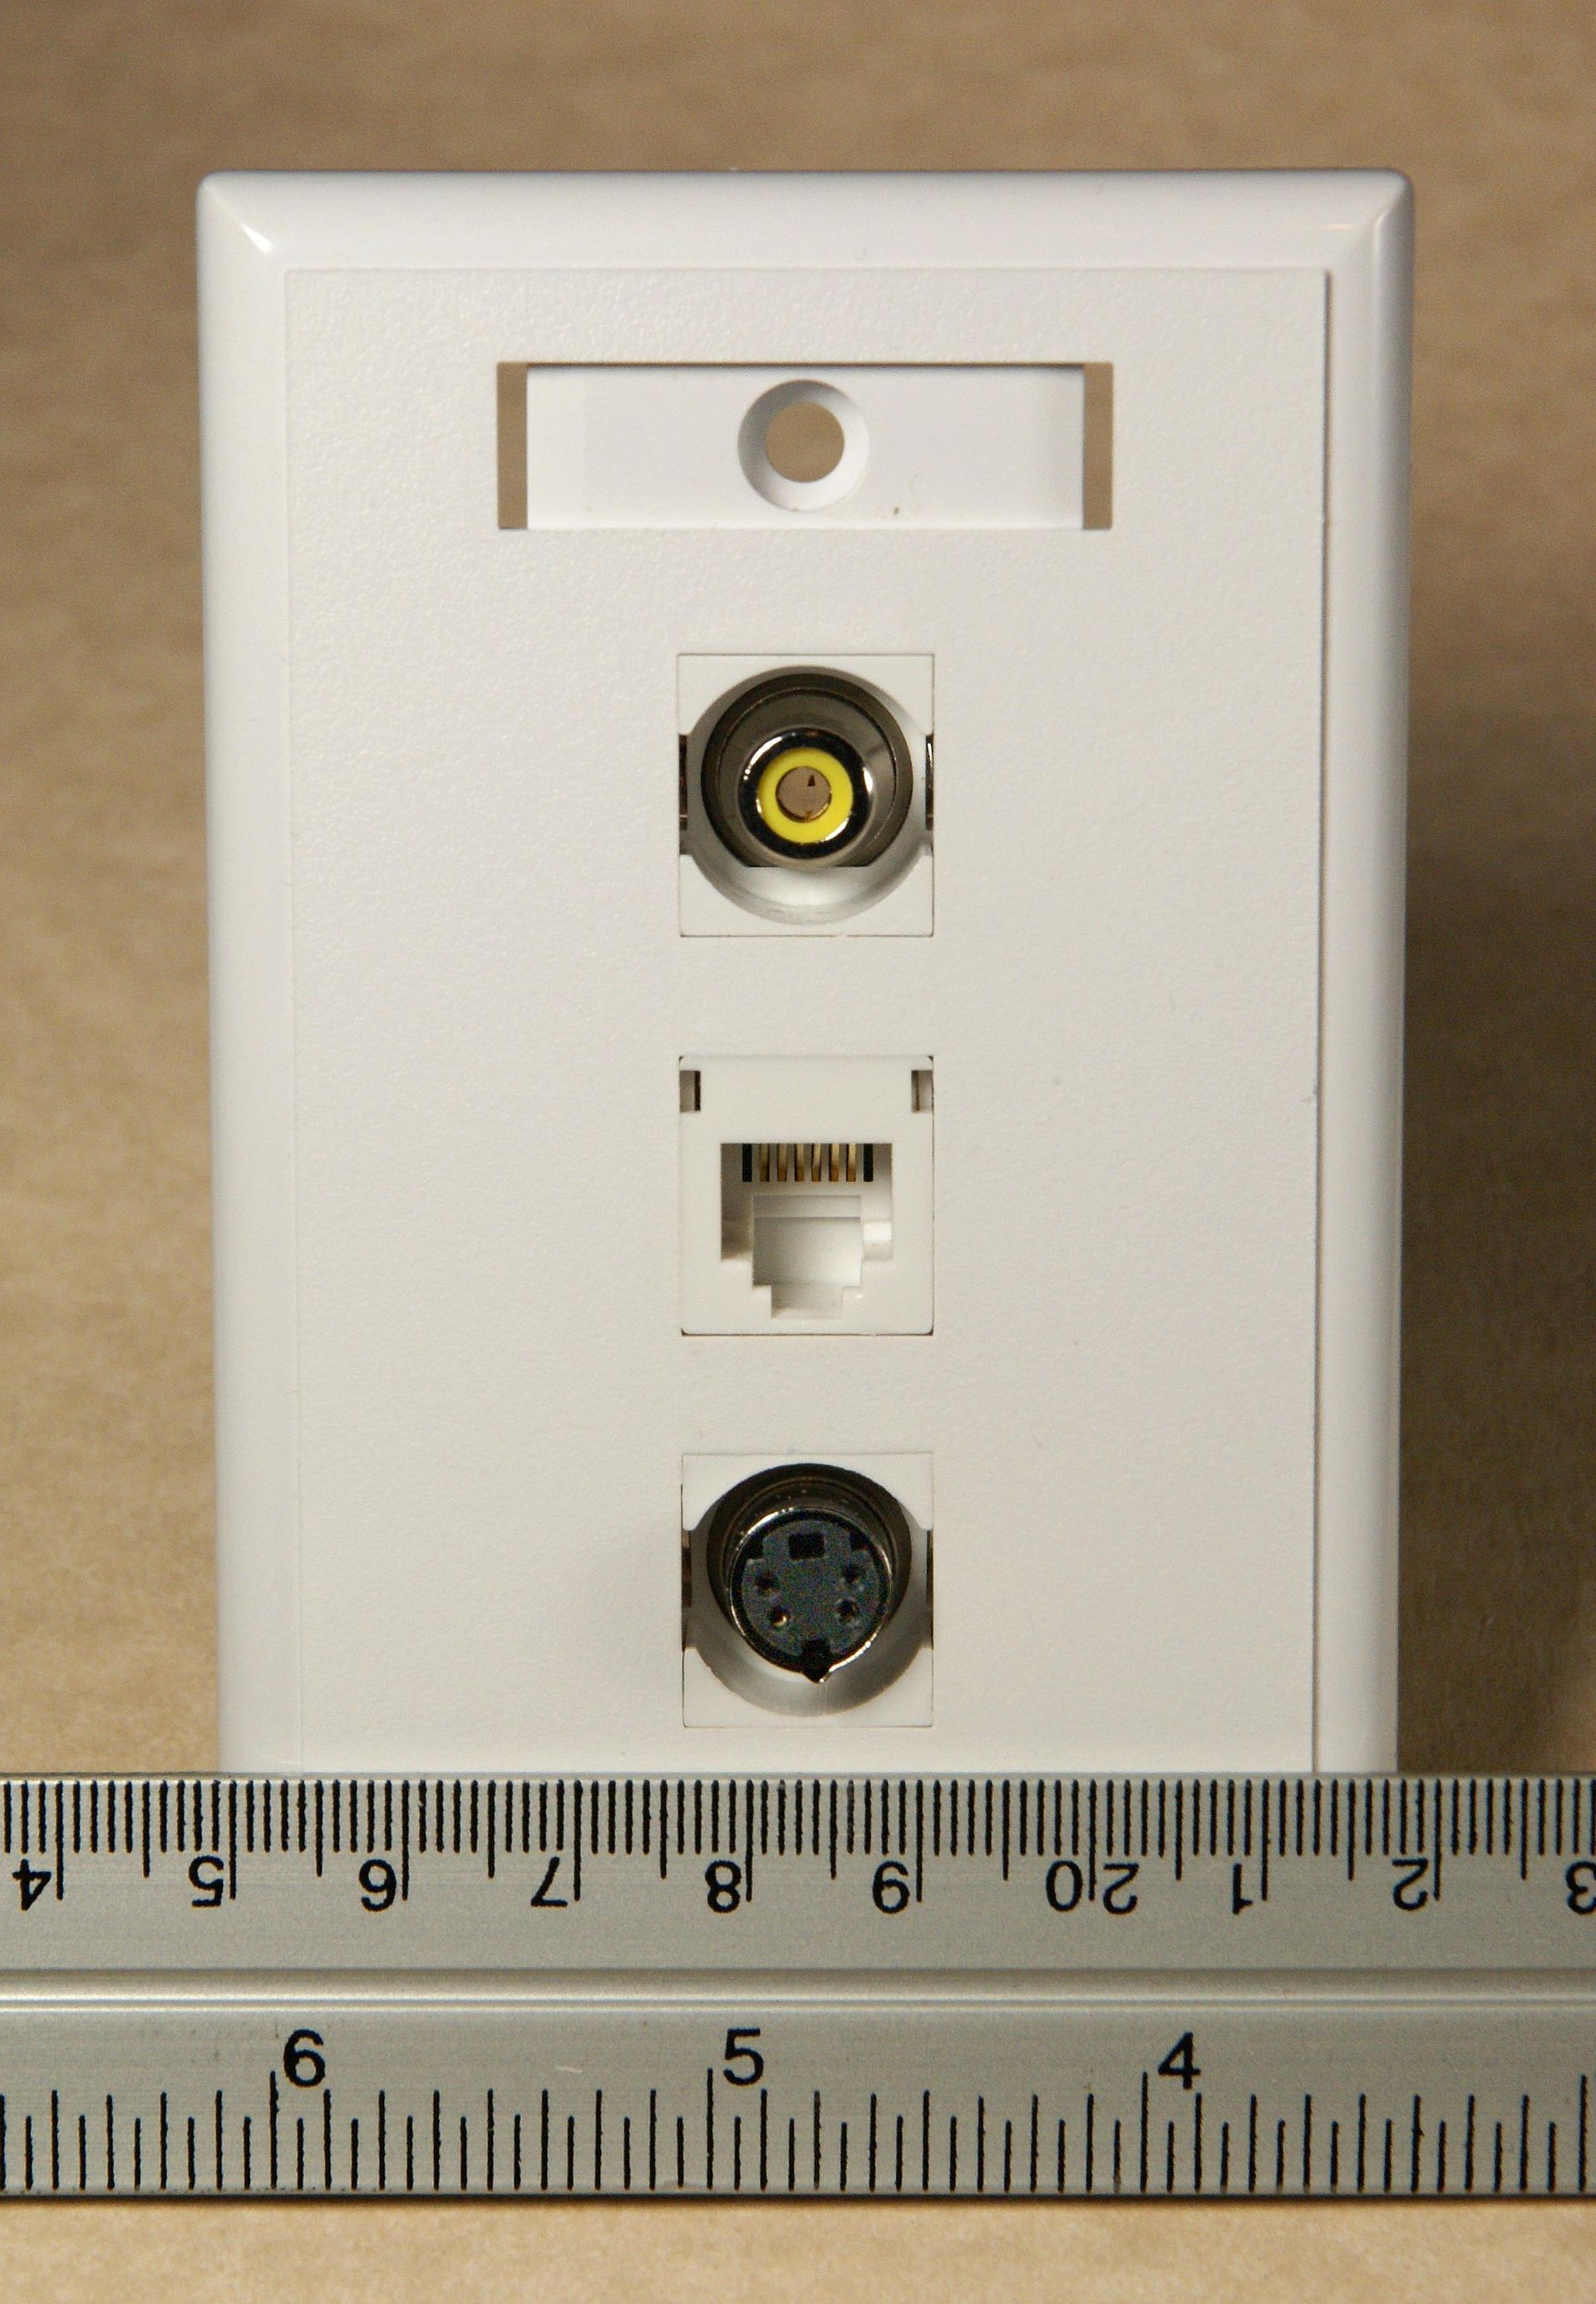
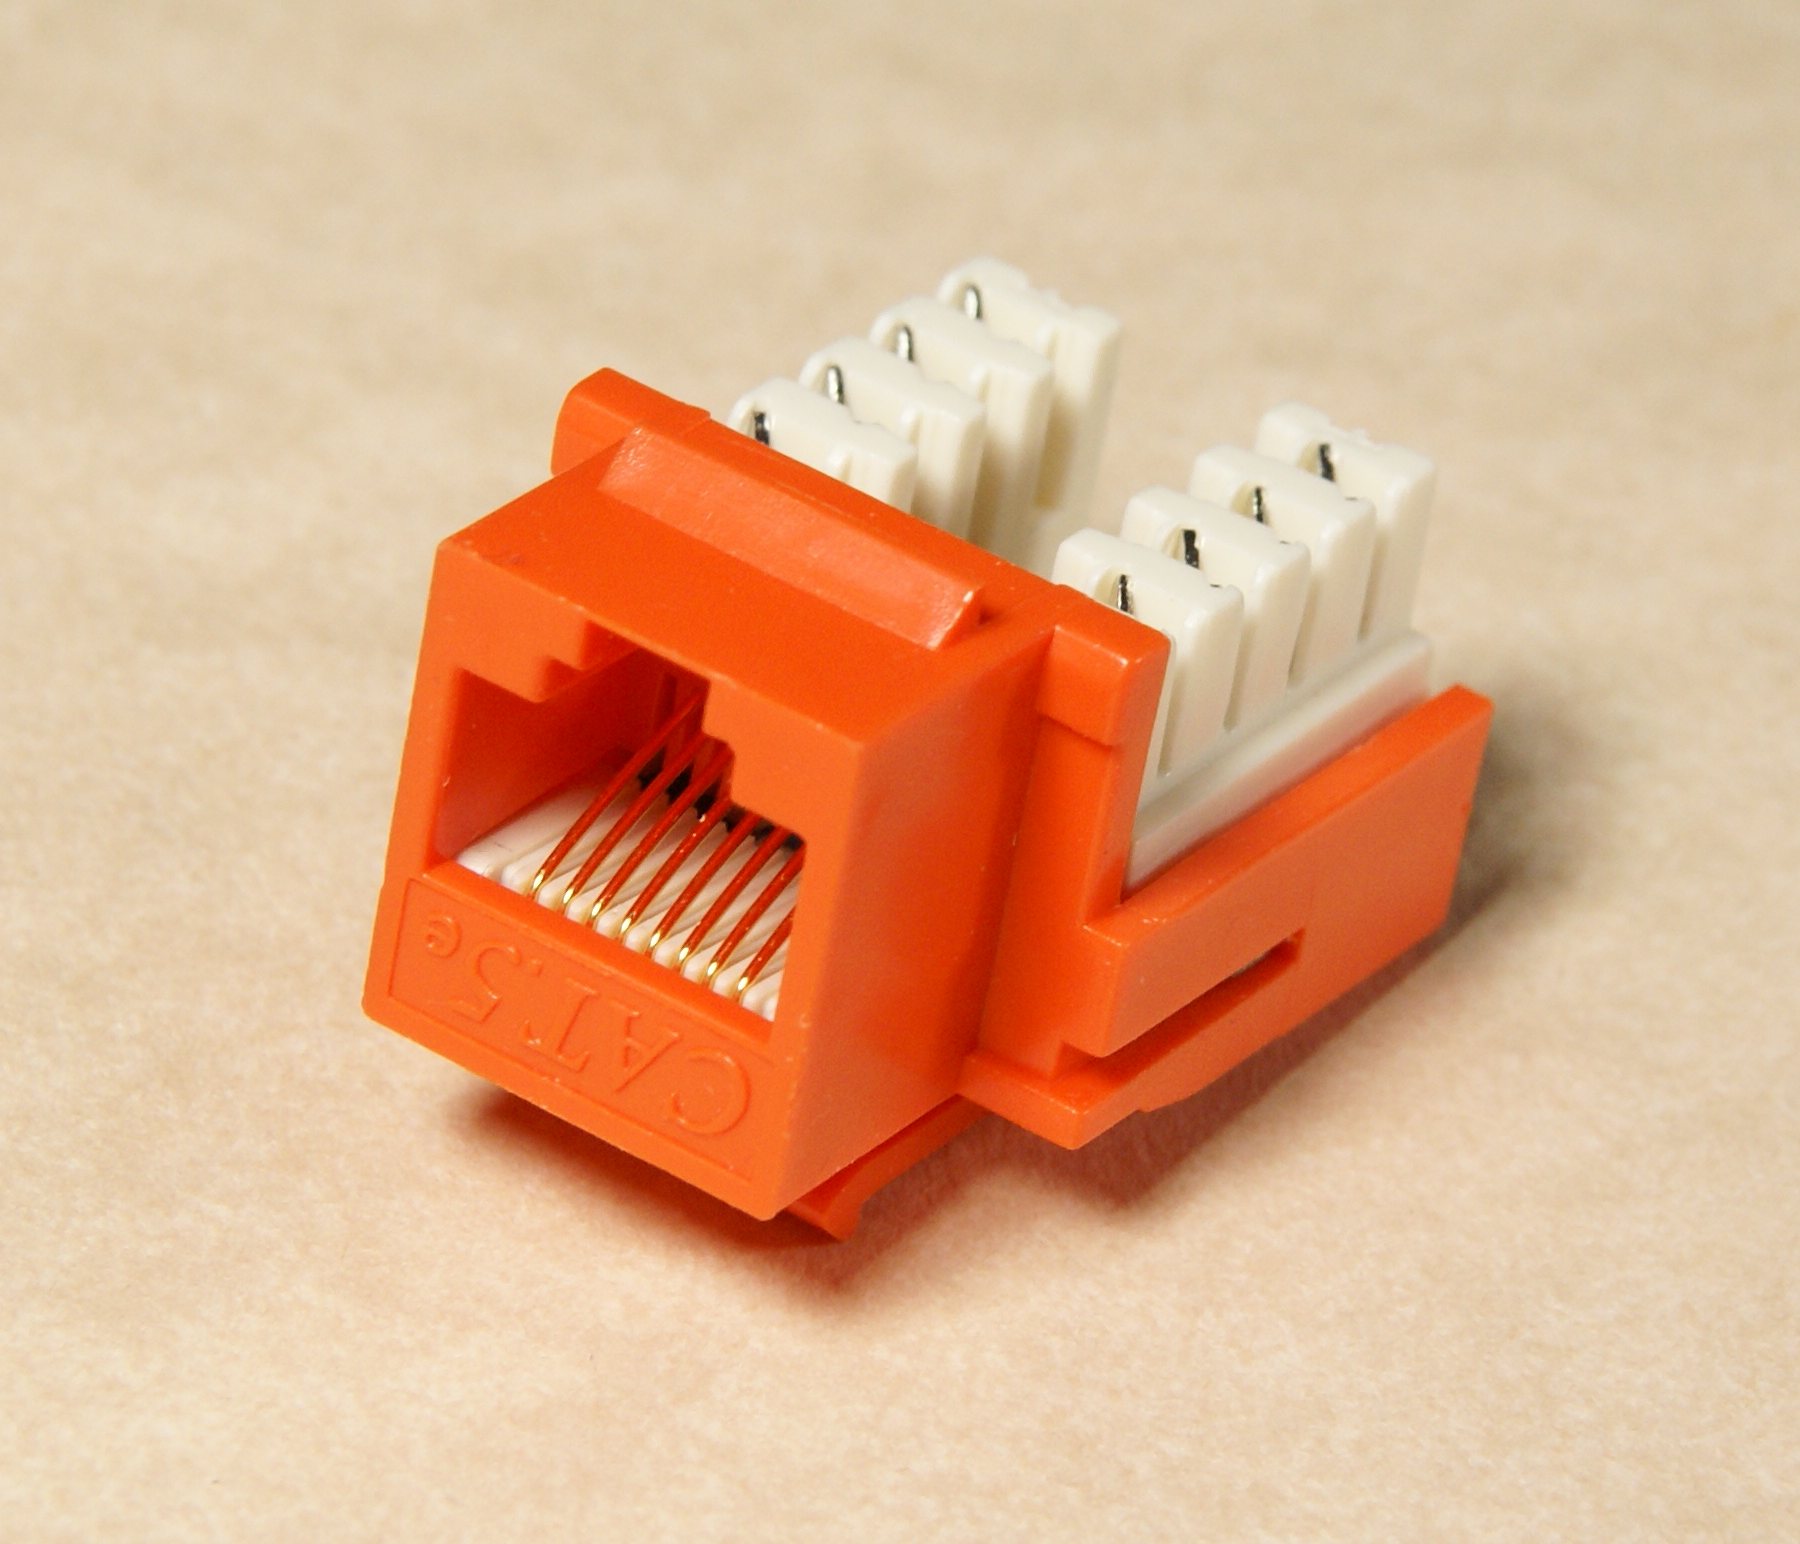
The starting point to consider is where does the Internet connectivity will come from. At home, it may be the telephone line plug, while in an academic (University) or corporate (company) environment it could be an ethernet female plug (called a keystone) on the wall.
Connecting your SOHO router to the Wide Area Network (WAN)
In the case of the phone plug, an ADSL router will be needed. In addition to the switch, router, access point and DHCP server shown in the figure above in this page, ADSL SOHO routers will also contain a modem, that allows connection to your ISP through the phone line. Configuration of an ADSL router for connection to the ISP is beyond the scope of this page. ISPs usually provide a username and password for the ADSL router connection together with detailed configuration instruction. They also often provide their own router to be installed locally in your home, maybe already setup for connection.
If an ethernet plug is already available in the wall of your office or lab, a plain non ADSL router will do the job. Let’s discuss this second scenario from the start. The keystone you have available on the wall will be connected, through a cable, to a switch somewhere in the building. Maybe on your floor, maybe in a central location that serves connectivity to the entire building. Building network configurations and wirings are highly variable and we cannot cover here all the possibilities. Suffice it to say that the ethernet keystone on your wall will be connected to a switch, and this switch will itself be connected to a router. Therefore the LAN we are about to build will be part of a larger network that spans your whole floor or building.
This larger network may, or may not, include a DHCP server. If it does, on plugging a device with a NIC (such as a computer or a SOHO router) to the keystone by using an ethernet cable, network parameters such as an IP address, a subnet mask and DNS servers addresses will be provided automatically to the NIC of your device by the DHCP server. If it does not, your device will have to be configured manually. Configuration details (for one, a valid IP address) will be typically provided by the entity in charge of the network. To setup your own LAN starting from this single keystone plug on the wall you will need, in a way or another, a valid “external” IP, the one your SOHO router will use to join the larger floor or building network. Again, this IP may be obtained by either DHCP or by the system administrator of your organization’s network. All the internal IP addresses of your LAN, you can instead manage yourself.

In practice, how can you configure your router to act as a DHCP client for the WAN connection, or maybe assign to the WAN interface network parameters manually? Your SOHO router will have a built-in web interface for this task and all the other tasks involved in using it to create a LAN. In order to access this web interface you will have to connect a PC or laptop to it, by using an ethernet cable and one of the router’s switch ethernet plugs.
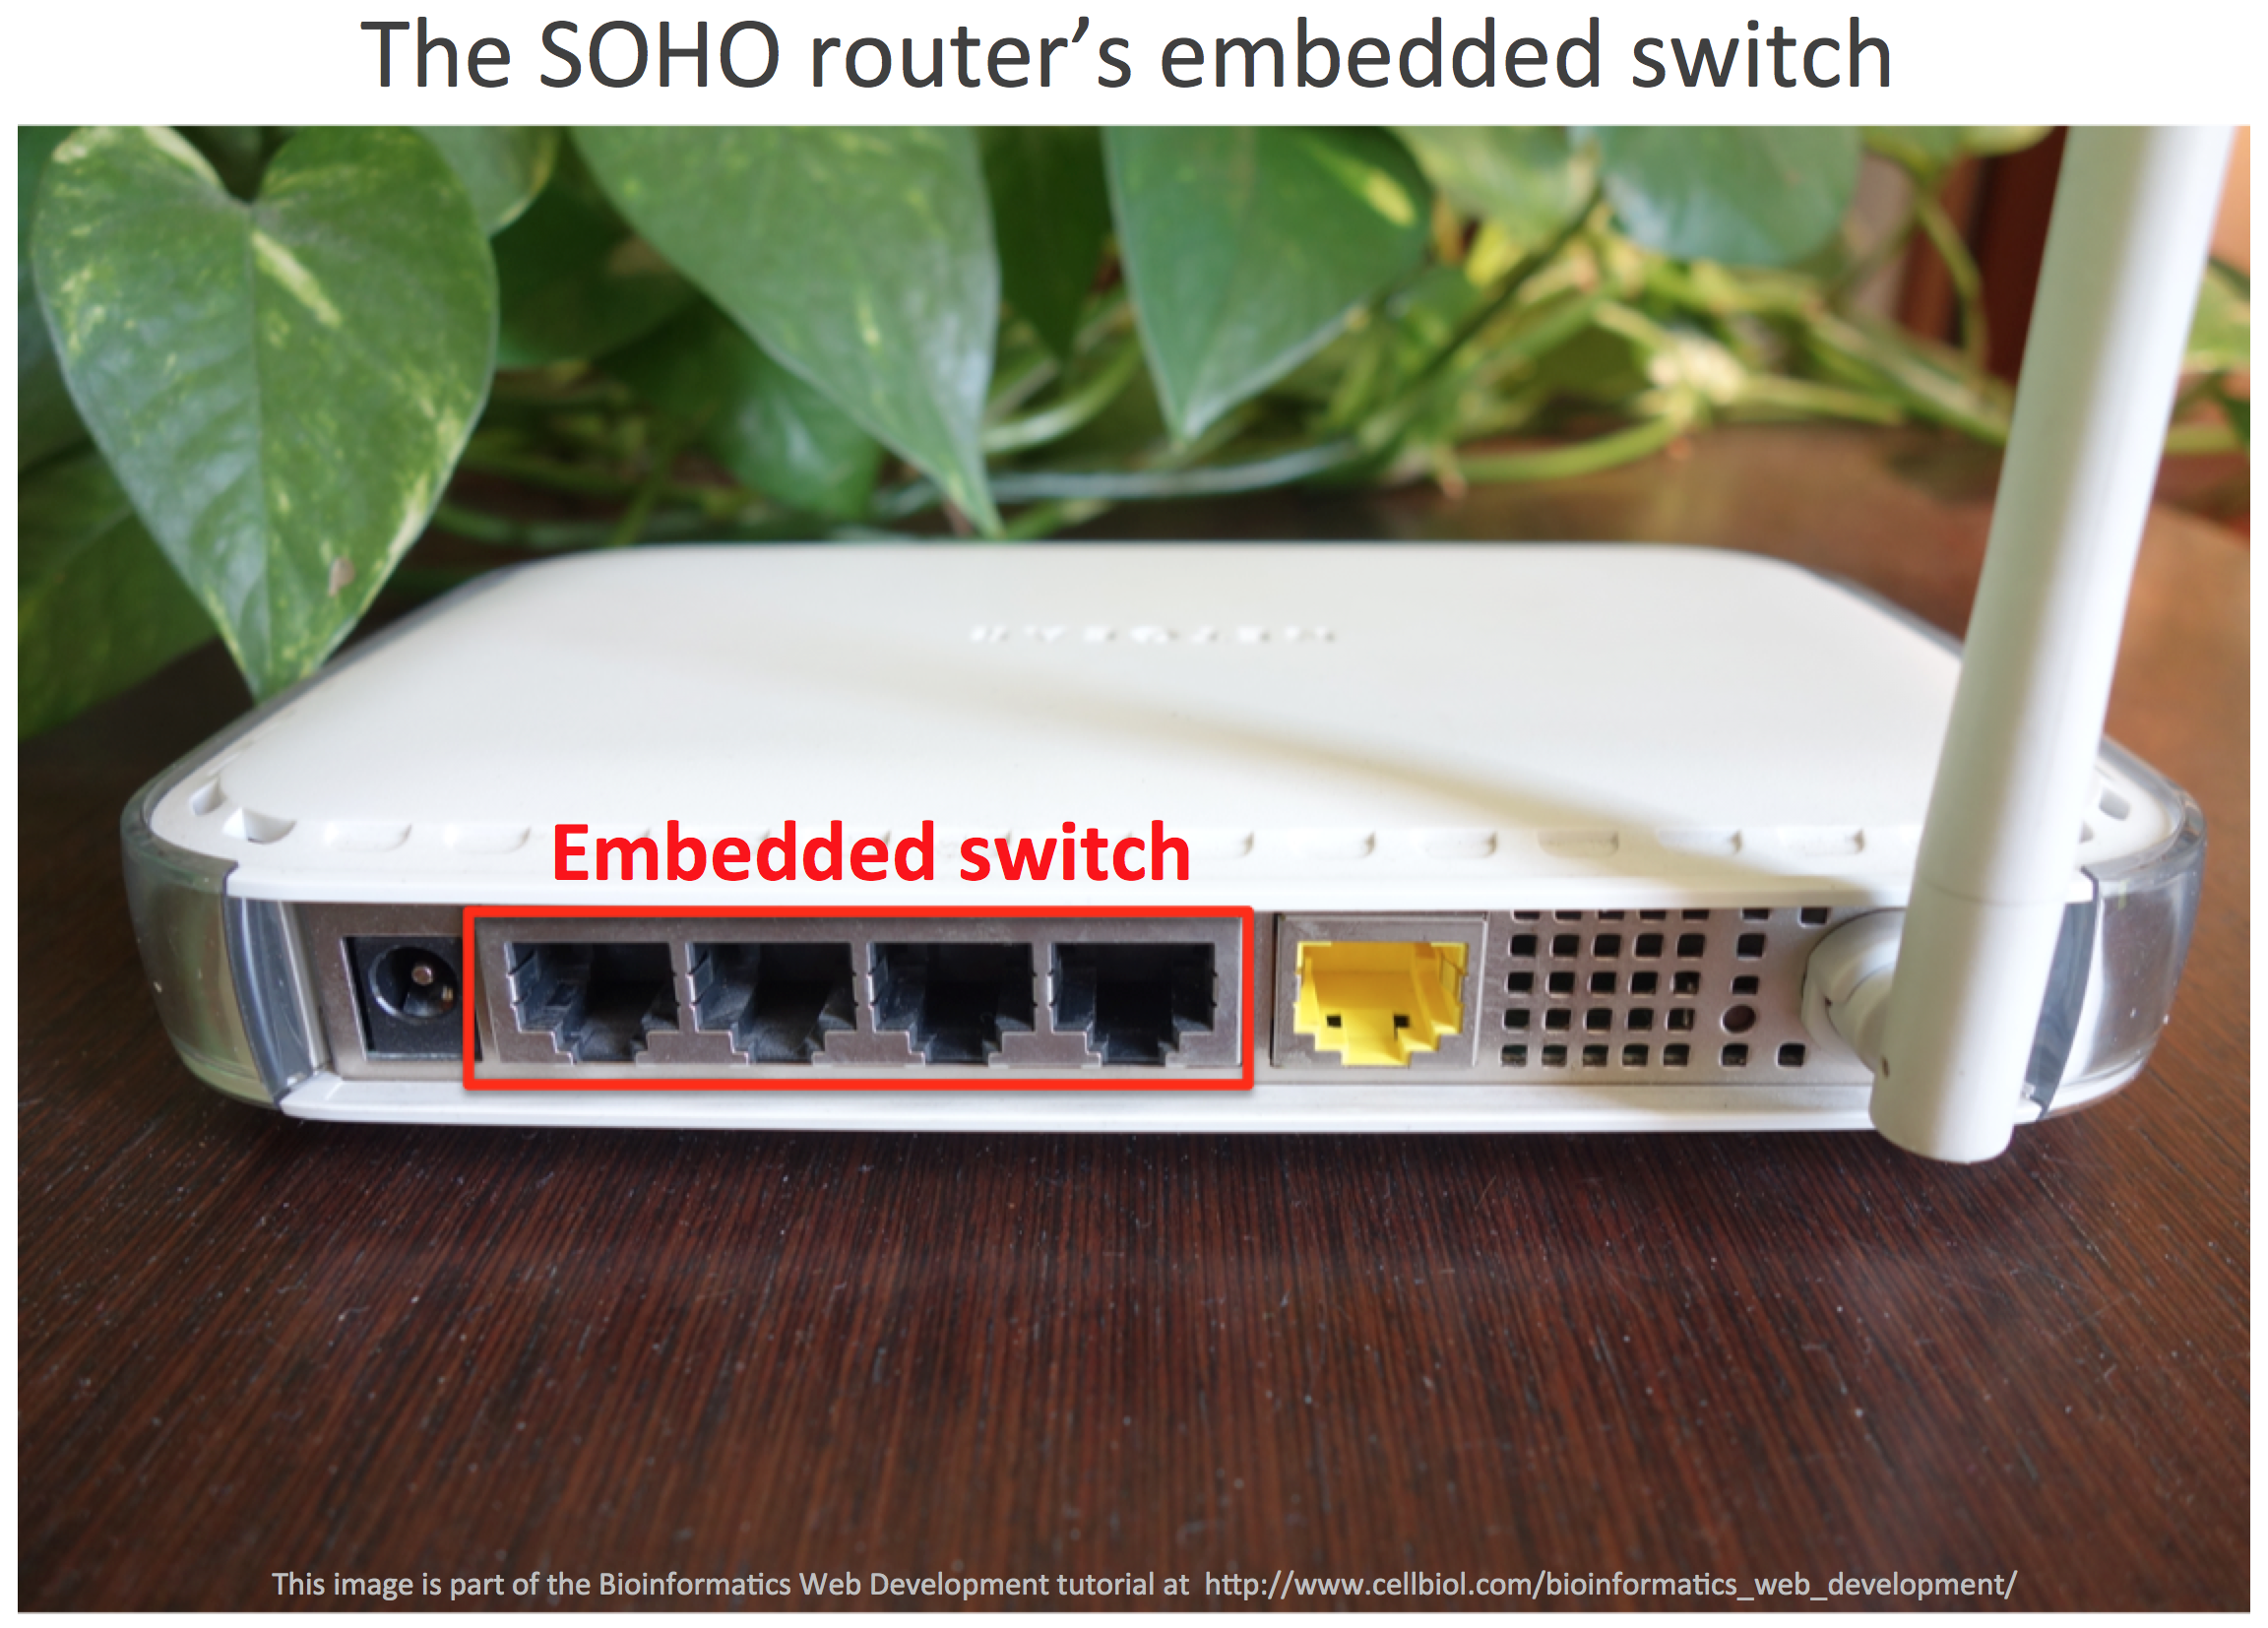
Let’s now connect for example a laptop to one of the router’s switch ports with a cable. For this connection to be successful, the laptop will typically have to be configured as DHCP client and get an IP address and the other network configuration parameters directly from the SOHO router’s DHCP server. Configuration of the laptop as DHCP client is usually the default, and so is configuration of the router as DHCP server, so, on average, all you will need to do is to plug an ethernet cable from your laptop to the router’s switch for a successful connection to occur.
Then you have to use your laptop browser to access the router’s web interface, whose address in most cases will be 192.168.1.1 (Linksys) or 192.168.0.1 (D-Link and Netgear). This may however be different depending on the router model.
If your laptop or PC runs Linux, typing
route -n
or
netstat -r -n
in a shell will provide the gateway (router) IP address within the LAN.
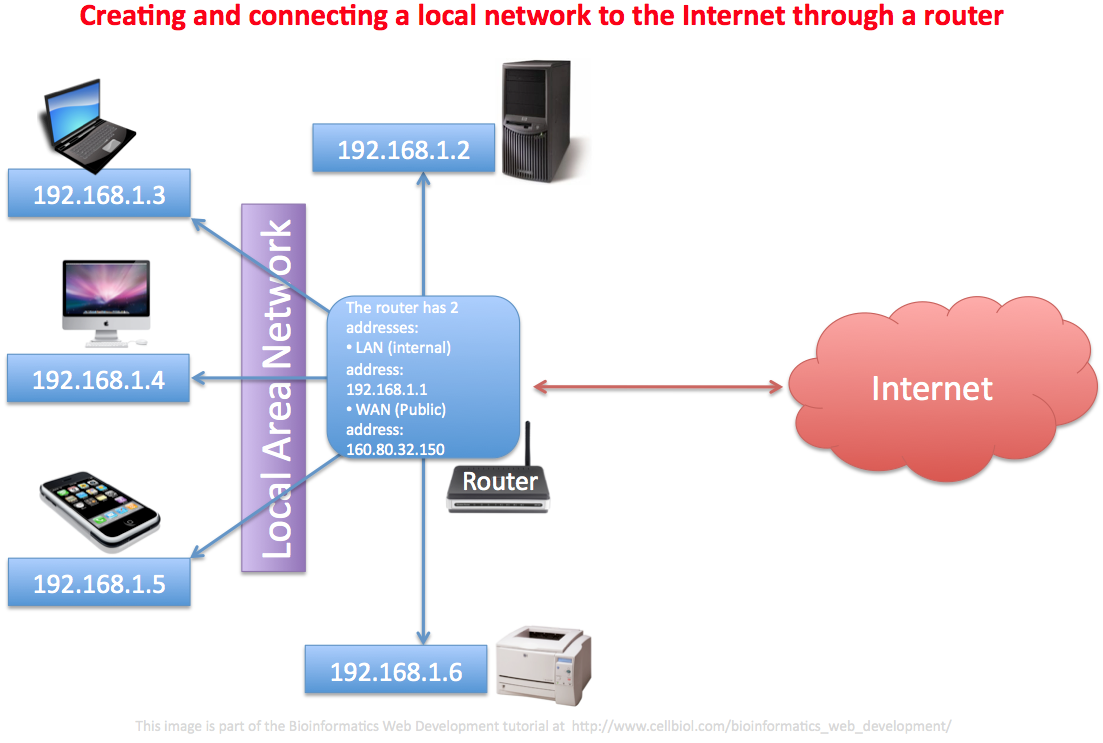
Tip: don’t be confused. SOHO routers have 2 different IP addresses that they respectively use to join the WAN and LAN networks. In the context of connecting a laptop or PC to the router to access the router’s web interface and set router’s connection parameter, we need to use the internal or LAN address of the router as address to visit through browser.
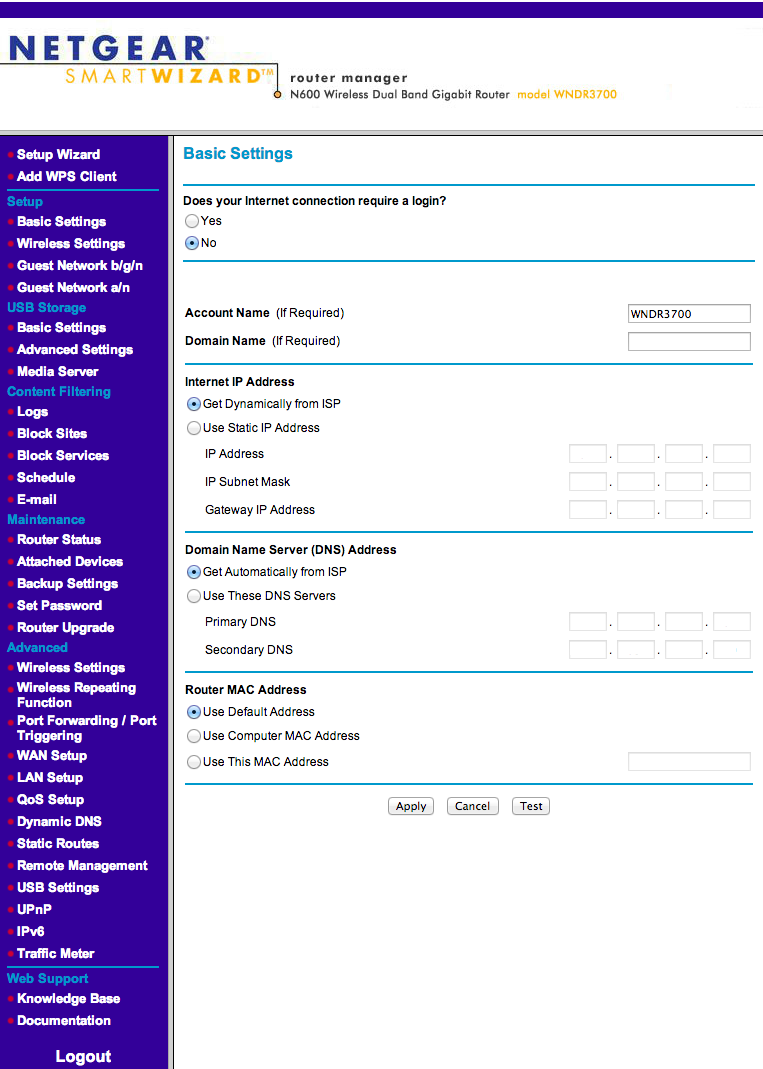
In the following figure the web interface for a Netgear SOHO router is show, in particular the initial setup page where you can decide if, in order to connect to the WAN, the router should behave as a DHCP client or get connection parameters (IP, subnet mask, gateway) assigned manually.
Configuring the Local Area Network (LAN)
Once the WAN connection of the router is set up correctly, we can proceed to the configuration of our LAN. In this respect, it should be noted that a WAN connection is only needed if we want to connect our LAN to the Internet, which is usually the case. We could however skip the WAN part if all we need is an unconnected, stand alone local network.
The LAN configuration part can be fairly simple, the relevant page for this on a Netgear router web interface is shown below.
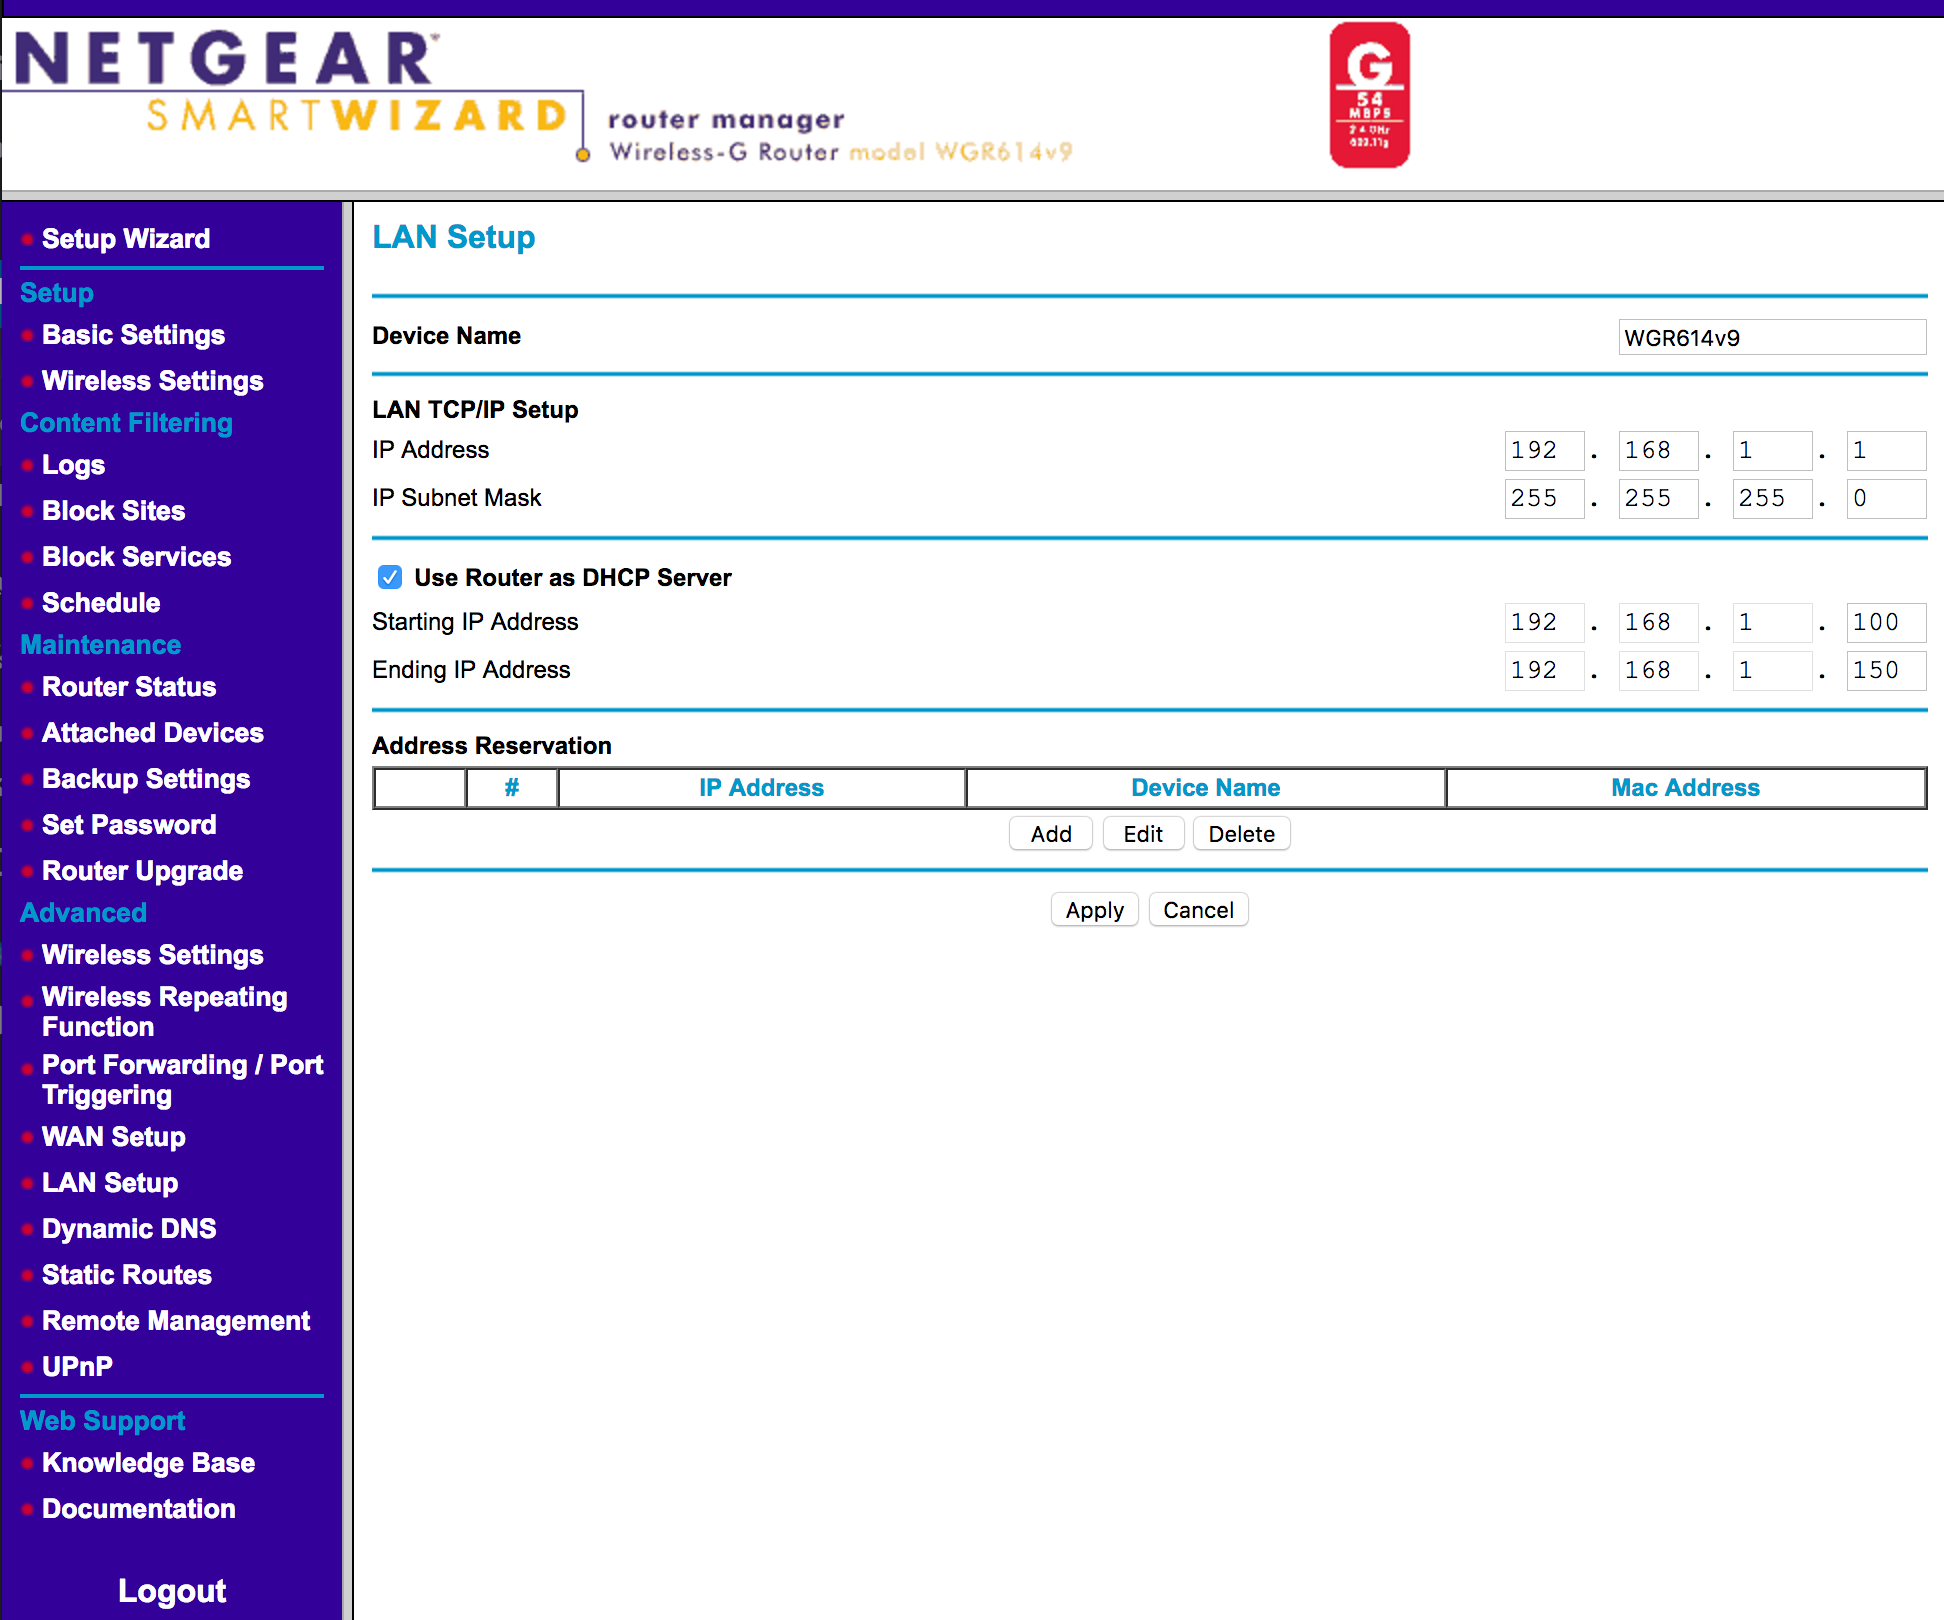
Let’s examine the sample LAN setup page shown above. In the first part, we can change the default internal IP of the router itself within the LAN. In this case it is 191.168.1.1, which is standard for Netgear routers. Based on the router IP, the web interface will assume a /24 configuration for the LAN (in this case this will be 192.168.1.0/24) and propose a range of IP addresses available for the DHCP server (second section of the LAN setup page) to be assigned to the devices connected to the router. This will apply to both the devices connected to the switch through a cable and the devices connected to the wireless access point. Indeed, the switch ethernet ports and the access point are bridged together, so that all connected devices to either the switch or the access point will belong to the same network (when properly configured, of course).
The last part of the LAN setup page is the “address reservation” part, in which we can decide to reserve certain IP addresses within the DHCP range established before to devices with a specific MAC address within the network. This is useful to ensure that certain devices, for example a shared printer or a network camera, can always be found at the same IP address within our local network, and that, if temporarily disconnected (for example when the printer power is shut off, maybe at night), the device IP is not assigned to another device by the router’s DHCP server.
If we decide to enable the router DHCP server, then all we have to do to connect devices to the LAN is to ensure, in each device, that the network settings are set to DHCP client (get network parameters/IP address/DNS server addresses automatically).
In alternative, we can configure each device individually by assigning:
– An IP address in the LAN range
– A subnet mask, typically 255.255.255.0 for a /24 network
– A gateway address: the internal/LAN IP address of the router
– DNS servers addresses, we could for example use those provided for free by OpenDNS, 208.67.222.222 and 208.67.220.220 at the time of this writing
Setting up the wireless network
SOHO routers usually have an embedded wireless access point that is bridged with the ethernet ports of the router’s switch, so that devices connected through cable or by wireless are effectively on the same network and can communicate seamlessly. Sometimes SOHO routers have an additional option for a guest wireless network with an option of “network isolation”, so that devices connected to the wireless guest network cannot communicate of have access to the main network. This can be useful for privacy or security reasons as it allows guests access the Internet without letting them access the home or lab network.
To configure a wireless network, the network is assigned a SSID (Service Set IDentifier), commonly known as the “network name”. If broadcasted, the SSID can be seen in the client (PC/phone/tablet) network settings, when available wireless networks to connect with are visualised. If not broadcasted, it has to be entered manually in the wireless settings of the client in order to connect to the corresponding network.

It is a common practice to encrypt the wireless communication between the clients and the access point. This can be achieved by using different encryption protocols such as WEP (Wired Equivalent Privacy, obsolete and easily crackable) or WPA/WPA2 (Wi-Fi Protected Access, the current standard at the time of this writing). The version of WPA commonly used in a small home or office setup is called WPA Personal. As we learn from Wikipedia:
WPA Personal
Also referred to as WPA-PSK (pre-shared key) mode, this is designed for home and small office networks and doesn’t require an authentication server. Each wireless network device encrypts the network traffic using a 256 bit key. This key may be entered either as a string of 64 hexadecimal digits, or as a passphrase of 8 to 63 printable ASCII characters. If ASCII characters are used, the 256 bit key is calculated by applying the PBKDF2 key derivation function to the passphrase, using the SSID as the salt and 4096 iterations of HMAC-SHA1. WPA-Personal mode is available with both WPA and WPA2.
WPA access is normally associated with a passphrase that can be specified in the router interface, as shown in the figure above. This passphrase is required for a client to connect to the wireless network and also used to encrypt the client-access point data exchange.
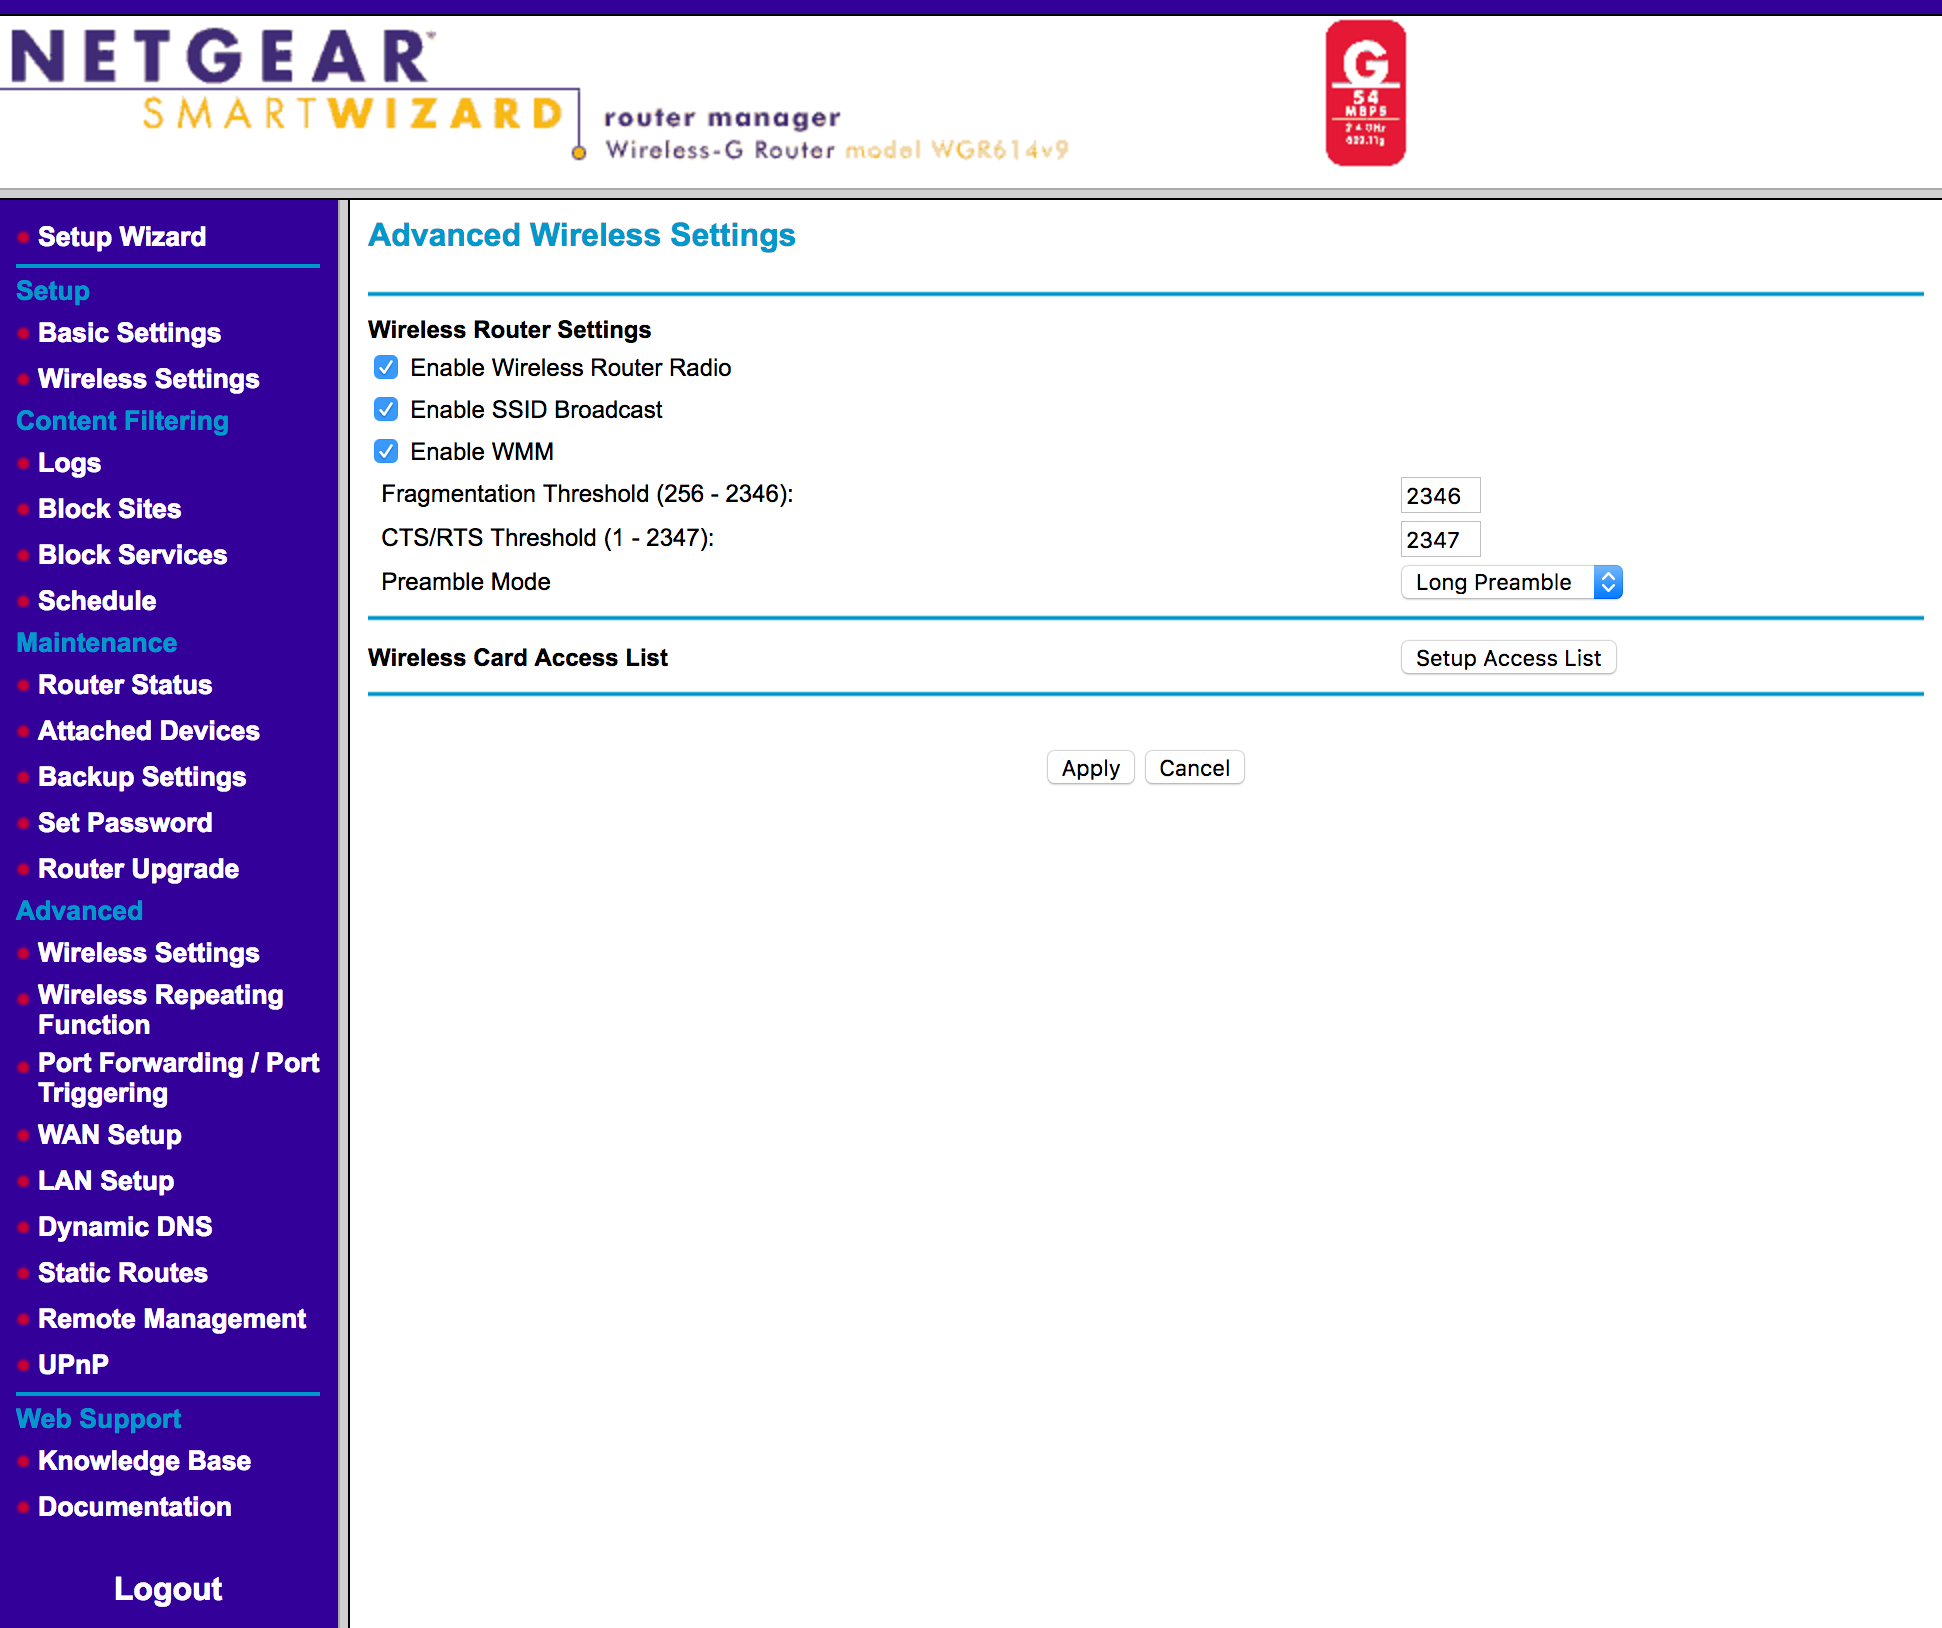
In the Netgear router web interface that we are using for these examples, the decision to broadcast the SSID or not corresponds to a setting in the “advanced wireless settings” section, see the “enable SSID broadcast” option in the figure below. In other SOHO routers the location of this setting may be different.
Private vs public IP addresses
So now you have your LAN perfectly setup, operational and connected to the Internet. Your laptop is connected to the SOHO router, you can browse the web and send e-mails. The router itself has an internal IP address of 192.168.1.1 (the default for Netgear routers) and on connection, your laptop was assigned an IP of 192.168.1.10 by the router’s DHCP server.
Here are a couple of simple question for you:
– Are you connected to the Internet with the IP address 192.168.1.10?
– Could you set up a web server on your laptop that users on the Internet could visit at 192.168.1.10?
Think about it for a moment before going further.
.
.
.
.
If your answer was yes to the above questions, please consider those other questions:
– How many Netgear SOHO routers were sold in the last year, with the very same 192.168.1.1 default IP address?
– How many users on the Internet are connected to a Netgear router right now, and were assigned by chance an IP address of 192.168.1.10?
Can you see what the problem is? Also considering that, on the Internet, IP addresses, that univocally identify hosts, have to be unique?
Here is what is going on.
IP addresses used inside LANs are private IP addresses, and they are only valid inside the LAN.
IANA, the Internet Assigned Number Authority, has reserved some sets of IP addresses to private networks. This is called the “private address space”.
Here is what we learn from this document by IETF:
Private Address Space
The Internet Assigned Numbers Authority (IANA) has reserved the
following three blocks of the IP address space for private internets:
10.0.0.0 – 10.255.255.255 (10/8 prefix)
172.16.0.0 – 172.31.255.255 (172.16/12 prefix)
192.168.0.0 – 192.168.255.255 (192.168/16 prefix)
192.168…. is a block of addresses that is reserved to private networks. There is actually no public host on the Internet with such an address.
When you browse the web with your 192.168.1.10 address, your actual public address on the internet, the one TCP/IP packets from the web server that hosts the web site you visit with your browser are sent back in order to reach your laptop is not 192.168.1.10 but rather the public (WAN) address of the Internet gateway you are connected to. This may be directly your SOHO router, or maybe an upstream router to which you SOHO router is connected to, this depends on how exactly your network is set up.
Let us get a handle on this with a little experiment.
There are several ways to check out which is your IP address inside the LAN, your private (LAN) IP address. You could look at your network settings for example. Under Linux or MacOS, you could type
ifconfig
in a shell.
Under Windows, you could start a shell from the search box by typing
cmd
and then type
ipconfig
This will show your private (LAN) IP address along with some other network information.
Now check out which is your public IP address by visiting the following web site: click here.
If you followed the directions closely, you should be able to see that your private IP address is different from you public address.
Within the LAN itself, you can reach other connected resources, such as a printer or maybe a network drive (an hard disk shared on the LAN) by using their internal LAN IP addresses. However the same resources are not available from outside the LAN, on the Internet, unless you apply some special configuration within your router to make this possible. In particular, you have to set up a Network Address Translation (NAT) rule in the SOHO router, and maybe also the Internet gateway of your organization, to make this happen.
A detailed description of NAT is beyond the scope of this page. However we hope that the little discussion and examples above will make it clear to you that private and public IP addresses are two different entities, and while private addresses will make it possible to access and share resources within the LAN (that could also be called the “intranet” in the context of this discussion), the sharing of resources on the Internet requires unique, public IP addresses to come into play.
Chapter Sections
[pagelist include=”36″]
[siblings]