Browser’s (user agent) default tag display settings
As shown in section 3-5, browsers have default appearances built-in for a number of tags. For example, h tags are always rendered in bold while the items (li) of an ul list are block elements, each highlighted by a “bullet” (by default an ul list indeed looks like a bullet list, like the ones available in common text editors). Thanks to this default styles built in the browsers, we could create HTML pages with HTML alone, without using CSS at all. Relying entirely on the default CSS of browsers would however considerably limit our control over the aspect of our pages.
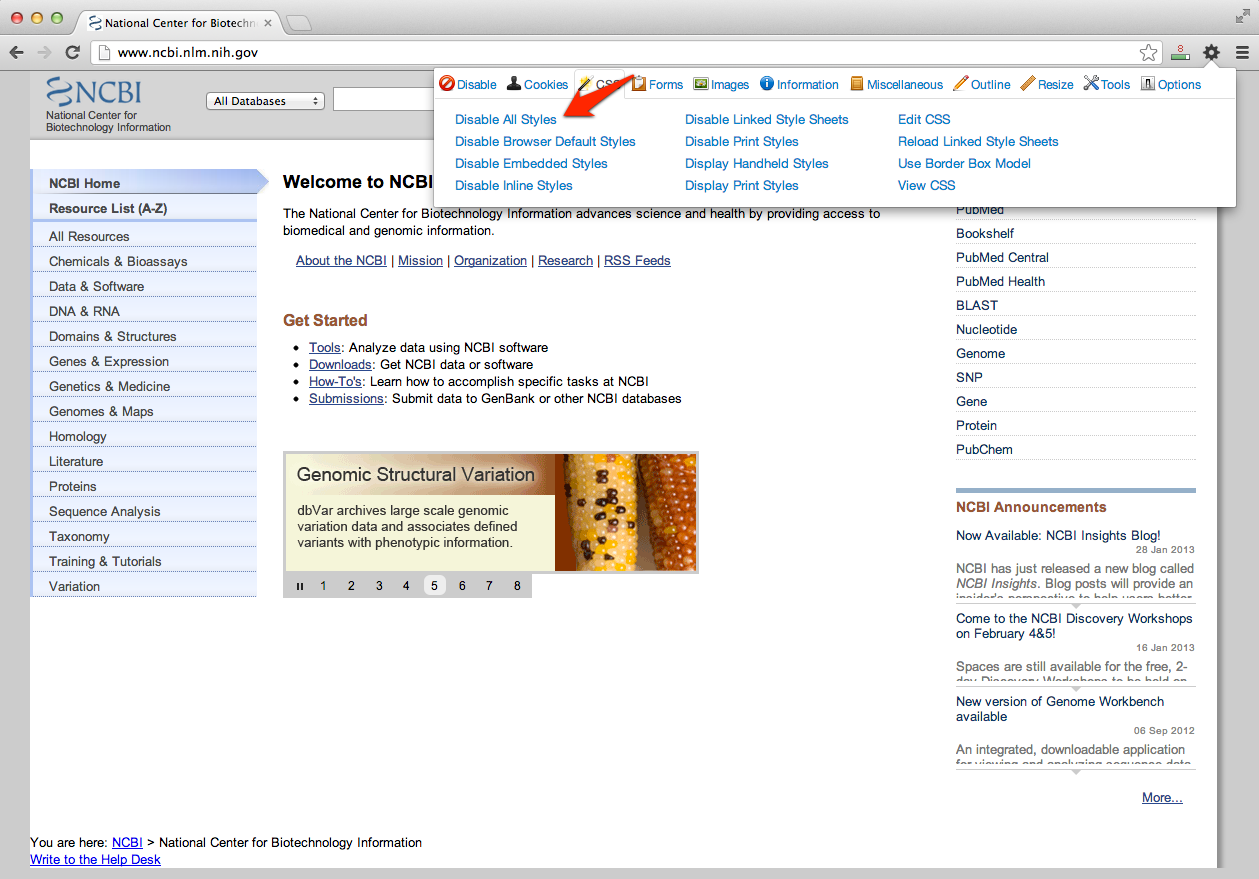
In order to appreciate how extensively custom CSS can shape pages, let’s look at a few web pages as they are, or after disabling CSS entirely. For this, we will need to install the Web Developer Toolbar, in Chrome (used in this example) or Firefox. This is called an add-on in Firefox and an Extension in Chrome. Once you have installed the toolbar, you can proceed.
![]() Chrome Web Developer extension
Chrome Web Developer extension
Let’s navigate to the NCBI web site.
In the upper-right corner of the browser you can access the dented wheel icon of the developer toolbar. Let’s use it to disable CSS as shown in the next figure.
This is the NCBI pages with styles disabled
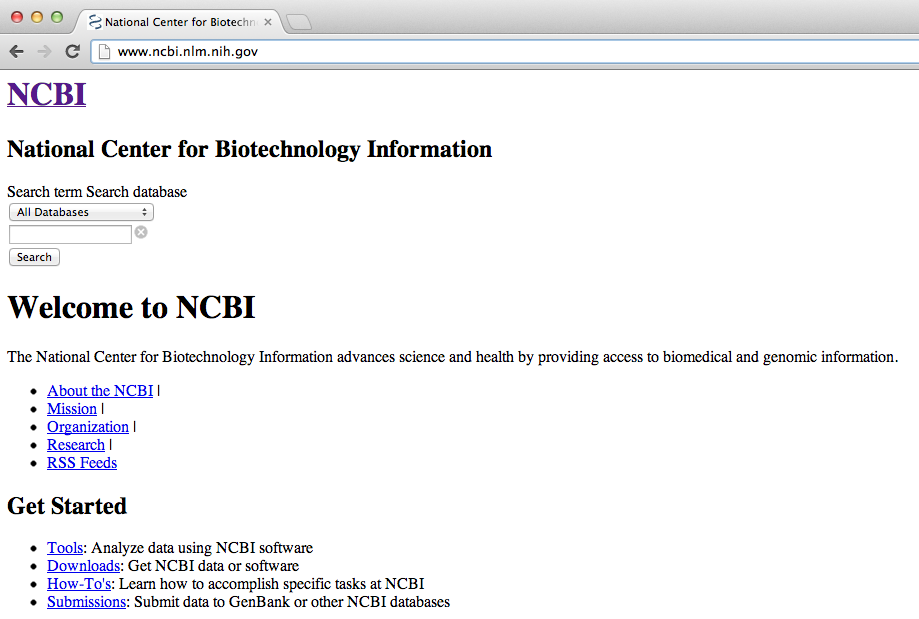
See how on disabling CSS, not only the colors, fonts, font sizes, alignments are gone, but also gone is the website overall layout. We will indeed see, in the next sections, how we can create sophisticated layouts by using CSS.
We suggest you now try the same on a couple more websites of your choice before proceeding.
The w3schools.com website implemented a great demo that perfectly illustrates how, starting from the very same HTML markup, styles can change the appearance of a web page dramatically: check out their “CSS Demo – One HTML Page – Multiple Styles!” page right now.
We have stated stated several times that Browsers have their own default stylesheet. The styles in the Browsers stylesheets can be overridden by our own CSS definitions. Let’s see a practical example. Consider the following code for a web page:
|
1 2 3 4 5 6 7 8 9 10 11 12 13 14 15 16 17 18 19 20 21 22 23 24 25 26 27 28 29 30 31 32 33 34 35 |
<!DOCTYPE html> <html lang="en"> <head> <meta charset="UTF-8"> <title>Testing span tag and css</title> <meta name="description" contents="This page is used to test the effects of styling the span tag with CSS"> </head> <body> <h1>Web development for Bioinformatics</h1> <p>This book is about web development for Bioinformatics and is articulated in several sections</p> <h2>Section 1: Web Applications</h2> <h3>Input</h3> <p>Lorem ipsum dolor sit amet, consectetur adipisicing elit, sed do eiusmod tempor incididunt ut labore et dolore magna aliqua.</p> <h3>Elaboration</h3> <p>Lorem ipsum dolor sit amet, consectetur adipisicing elit, sed do eiusmod tempor incididunt ut labore et dolore magna aliqua.</p> <h3>Output</h3> <h2>Section 2: Web Files</h2> <h3>Editing files</h3> <p>Lorem ipsum dolor sit amet, consectetur adipisicing elit, sed do eiusmod tempor incididunt ut labore et dolore magna aliqua.</p> <h3>Uploading files</h3> <p>Lorem ipsum dolor sit amet, consectetur adipisicing elit, sed do eiusmod tempor incididunt ut labore et dolore magna aliqua.</p> <h2>Section 3: Learning HTML</h2> <h3>HTML</h3> <p>Lorem ipsum dolor sit amet, consectetur adipisicing elit, sed do eiusmod tempor incididunt ut labore et dolore magna aliqua.</p> <h3>CSS</h3> <p>Lorem ipsum dolor sit amet, consectetur adipisicing elit, sed do eiusmod tempor incididunt ut labore et dolore magna aliqua.</p> </body> </html> |
This example is better followed by using the Chrome browser. You can copy-paste the code above in a blank page on your server, save the page and open it with chrome.
On the opened page, right click on one of the h2 titles and choose “inspect element”.
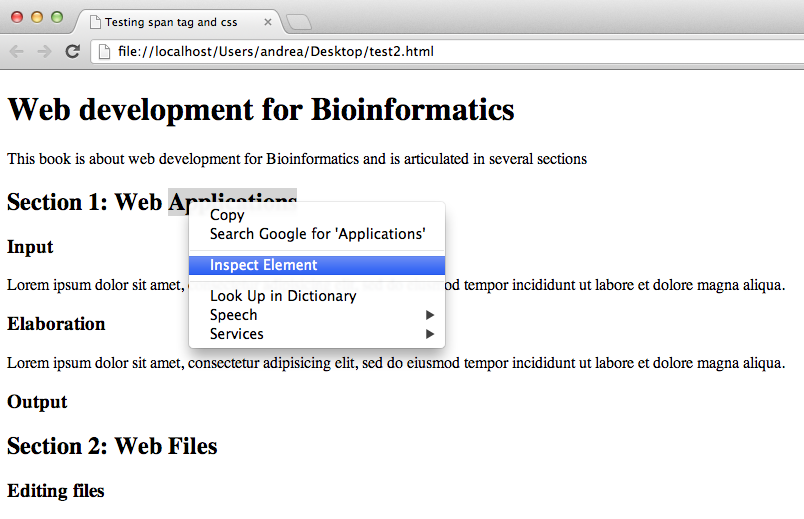
This will open the Chrome Developers tool window, as show in the next figure.

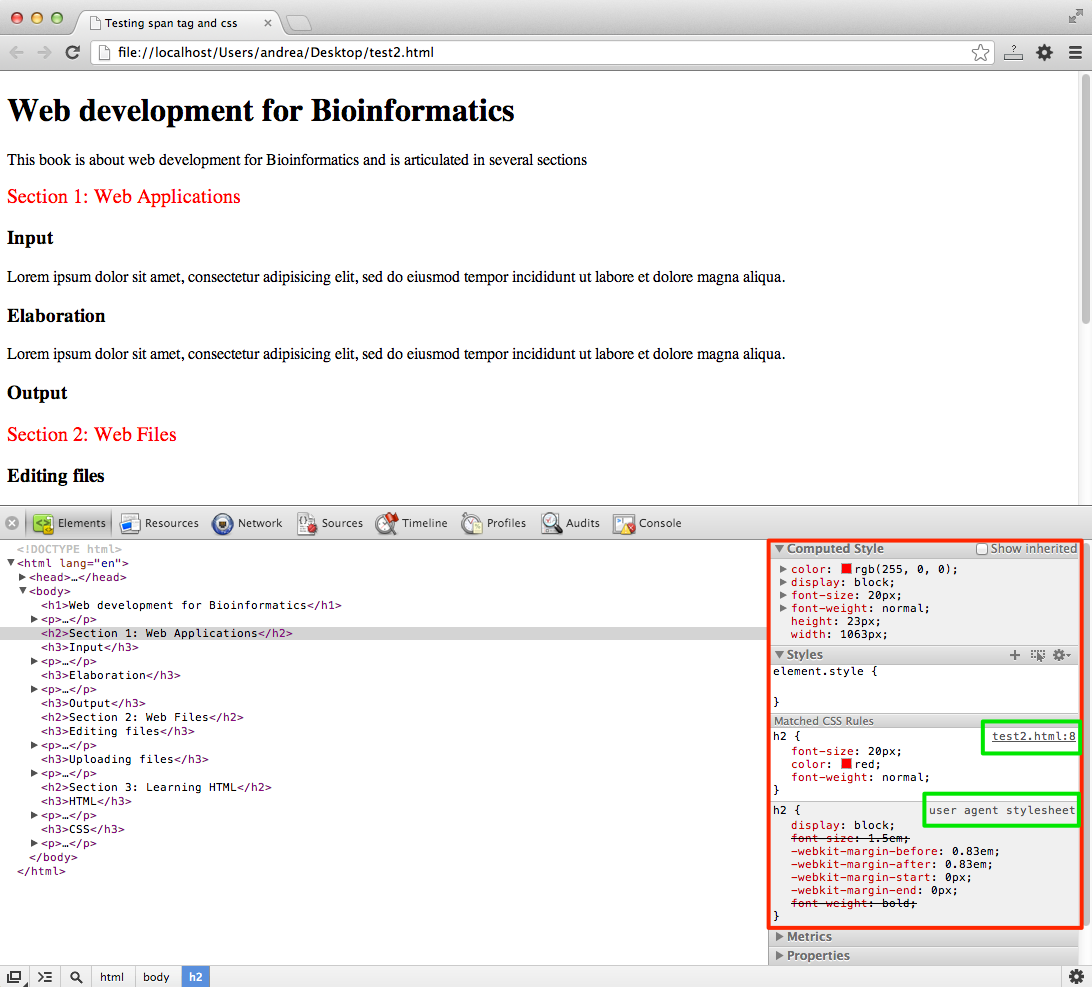
In the previous figure you can see the “user agent stylesheet” rules, in the box to the right highlighted in red. Since our page does not have any custom style definition associated with it, the h2 tag that we have inspected in this example is displayed according to the Browser (user agent) default styles.
You see how, as all h tags, for the h2 tag the font-weight property is set to “bold” in the user agent stylesheet (last declaration of the block).
Let’s now override this behavior by adding a few CSS declarations for the h2 tag. For practical reasons, we can insert the style declaration in the head of our page at this time:
|
1 2 3 4 5 6 7 8 9 10 11 12 13 14 15 16 17 18 |
<!DOCTYPE html> <html lang="en"> <head> <meta charset="UTF-8"> <title>Testing span tag and css</title> <meta name="description" contents="This page is used to test the effects of styling the span tag with CSS"> <style type="text/css"> h2 { font-size : 20px; color : red; font-weight : normal; } </style> </head> <body> ... |
In the style tag, in the head of the HTML page, we have used a simple CSS selector to select all the h2 tags of the page. For selecting all tags of a certain type, we can simply use the name of the tag itself as a selector, in this case “h2”. We have then assigned three declarations to these elements (figure 3-7-6).
One is a new property of the tag, the “color : red” declaration.
The other 2 actually override the values of existing properties of the h2 tag: the size and the font-weight.
We have now set the size to 20 pixels, instead of 1.5em (more on pixels and em later).
We have also set the font-weight value back to “normal” which will now override the “bold” default of the user agent.
This new situation is very well described graphically in the Chrome inspector tool (next figure).
The hierarchical nature of CSS
Because of the intrinsic hierarchical nature of CSS (Cascading indeed refers to this), it is a common situation that several definitions for the same element exist. For instance, in our example above, there are two distinct style declarations for the h2 tag, one by the user agent and another inserted by us in the head section of the html page. At the end, only one of these definitions will “win”. This is what the “computed style” part of the Chrome inspector tool is about. This box show the “final decision” of the browser, styles-wide, with respect to an element.
The decision about the “winning style” is made on grounds of the declarations specificity and position. Although this this might seem intimidating at first, once you become familiar with basic styling, those precedence rules start to make a lot of sense. They indeed follow logical and predictable patterns. For more insights on the CSS precedence rules you may want to read the formal CSS cascading and inheritance specifications by the w3c and this nice article on precedence on the Jenkov.com web site.
We will take a pragmatic approach and start to use CSS right now for a first basic task: formatting the most common HTML tags, the ones we have already seen here.
CSS Declarations
CSS are used in the form of one or more CSS Declarations, attributed to a selection of the elements present in the web page. The basic syntax is show in the next figure.
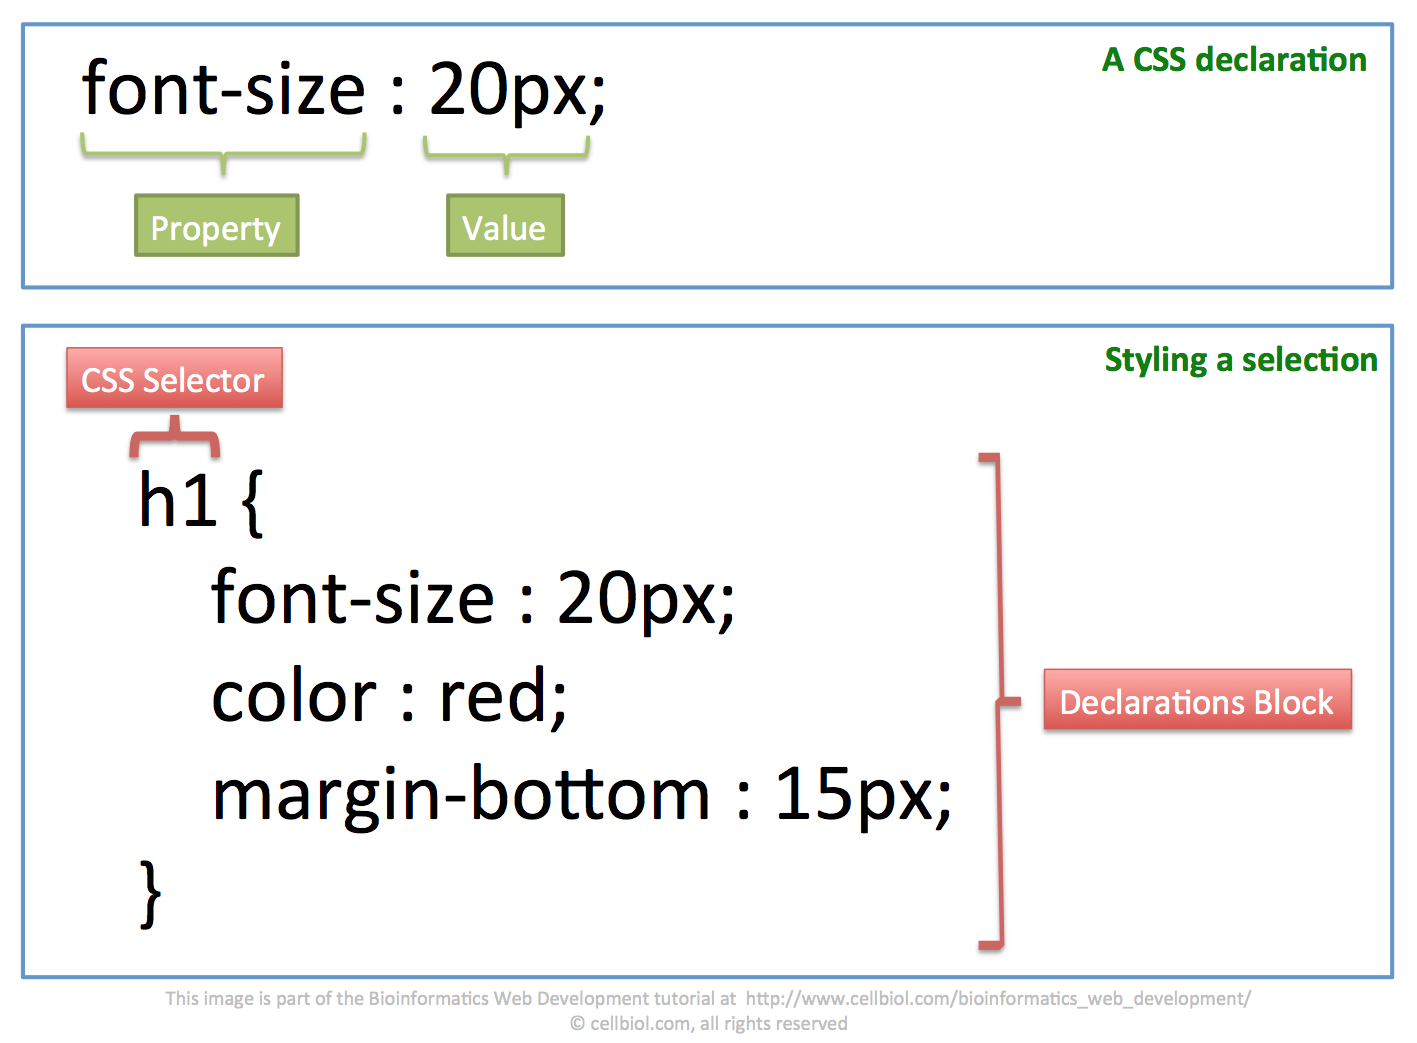
As shown in the previous section, CSS declarations can be:
- Included directly into a tag with the style attribute (to be avoided in general)
- Included as elements or classes declarations in the head of the HTML page
- Included as elements or classes declarations in an external stylesheet file and then linked to the HTML page with a “link” tag (favored option)
We will use the third option. In order to follow this section, we invite you to create a basic scaffold HTML page and styles.css file, as described in the previous chapter.
Load the CSS file in the HTML file by including:
|
1 2 3 |
<link rel="stylesheet" href="/css/styles.css" type="text/css"> |
in the head of the HTML page source.
CSS selectors
In order to style elements of the HTML pages with CSS, the first step is to write a proper selector for these elements (see figure 3-7-6).
The most basic selectors are the names of the tags we want to style. We have seen how several tags have a default aspect (user agent style). em is rendered in italic, strong as bold, ul/li as bullet lists etc..
We could define a style for each one of these element, that adds properties to the tags, overrides existing properties values, or both, by simply using the tag name as CSS selector:
|
1 2 3 4 5 6 7 8 9 |
em {...style declarations here...} strong {...style declarations here...} h1 {...style declarations here...} h2 {...style declarations here...} ul {...style declarations here...} li {...style declarations here...} ... |
Selecting tags this way will change the appearance of all the tags of a certain type in your page. For example styling em with the em selector will style all the em tags in a page. This is often fine. For example defining a custom style for your title tags h1, h2, h3 (up to h6 if you plan to use those), site-wide, makes a lot of sense.
In some situations however, you may wish to select a only a subset of the elements identified by a certain tag name. A good example could be lists. There are several uses for lists in a web site, and it is common to use lists, within the same page, for quite different purposes. For example lists are often used to create a hierarchical navigation menu, either horizontal or vertical. This menu could be present in all the pages of a web site. Then some pages will contain bullet lists in the main page contents, in addition to this navigation menu list.
The bullet list and the navigation menu list are both defined by ul and li elements. However, they generally look quite different. The styling of the navigation menu will typically make it so different from a standard default bullet list that you may even fail to see that it is a list, until you disable styles on the page, or maybe have a look at the source code.
In these situations there are two things we can use to create a subset of elements: ids and classes.
How to assign an id to a tag element
An id will uniquely identify a single element of a web page. In a particular page you can use a specific id name only once. In the following example we show our hypothetical navigation menu, that was assigned the id “nav-menu-left” by adding an “id” attribute to the ul tag. As usual, we suggest you use meaningful, explicit names for your ids.
|
1 2 3 4 5 6 7 |
<ul id="nav-menu-left"> <li>….</li> <li>….</li> <li>….</li> </ul> |
It makes sense to assign an id to an element in the page that is unique, such as for example a specific navigation menu (top-menu, left-menu, bottom-menu etc..).
How to assign a class to one or more tag elements
For our bullet list in the contents of the page, we might want instead to use a class. Using a class has the advantage that we can have several instances of the same class within a page, that will all look the same. For this specific example, you see how it makes sense to have several bullet lists in a page, because they are needed in the text, and a single left navigation menu (present in all the pages of the website – this very website is a good example of this kind of setup).
Let’s assign a class called “standard-contents-list” to one of out bullet lists by adding a “class” attribute to the ul tag:
|
1 2 3 4 5 6 7 |
<ul class="standard-contents-list"> <li>….</li> <li>….</li> <li>….</li> </ul> |
How can we now select only the element with a particular id in the CSS? And what about selecting all the elements belonging a particular CSS class?
Selecting an element with a specific id
To select the element with a particular id we use the id name preceded by a # sign:
|
1 2 3 |
#nav-menu-left {...style declarations here...} |
It should be noted that the # sign is often used in programming languages and linux configuration files to “comment” code (making lines of code inactive), and to add plain text comments to the code. This is not the case for stylesheets, where the # is an id selector.
Commenting code in CSS
In CSS, comments can be included (and code commented out) by using /* and */:
|
1 2 3 4 5 6 7 8 9 |
/* EM AND STRONG */ em {...style declarations here...} strong {...style declarations here...} /* H TAGS */ h1 {...style declarations here...} h2 {...style declarations here...} |
This is also very useful, as show above, to insert titles in the CSS file to subdivide it in sections and make it more readable.
Selecting all elements belonging to a class
To select all the elements belonging to a class we use the class name preceded by a dot:
|
1 2 3 |
.standard-contents-list {...style declarations here...} |
if we want to restrict the declaration only to the list (ul) elements that belong to this class:
|
1 2 3 |
ul.standard-contents-list {...style declarations here...} |
Selecting several different elements at the same time
To attribute a definition to several elements/selections, include the selectors separated by commas.
Let’s say we want all h tags to render as red:
|
1 2 3 4 5 |
h1, h2, h3, h4, h5, h6 { color : red; } |
Selecting elements only if they are child of another element – Context information
|
1 2 3 4 5 6 |
aside h1 { color : green; font-size:12px; } |
This will select all h1 tags contained within an aside tag. h1 tags located outside aside tags will not be affected. In this construction, aside is called “the context” in which the declarations are applied.
Here’s another example:
|
1 2 3 |
#main-contents-div a {color : darkgrey; border-bottom : 1px dashed red;} |
This specifies that links (a tags) within the element (will be a div in this example) with id “main-contents-div” will have a dashed red border at the bottom and will have a “darkgrey” text color (more on colors later in this section). Here’s a link styled according to this example for you to see how these style declarations render:
Selecting elements that have a specific attribute within the tag
It is possible to select all the element that have a particular attribute within the tag. The selector will be the attribute name within square brackets
All elements with a “width” attribute:
|
1 2 3 |
[width]{...} |
All elements with a “title” attribute:
|
1 2 3 |
[title]{...} |
Selecting elements that have a specific attribute and value within the tag
All elements with target=”_blank” in the tag:
|
1 2 3 |
[target=_blank]{...} |
Selecting elements that have a specific attribute whose value starts or ends with a specific string
All links that point to a pdf document. The $ specifies that the string after the equal to sign should be located at the end of the value string. This is reminiscent of the regular expressions syntax.
|
1 2 3 |
a[href$=".pdf"]{...} |
All links that point to websites with an https protocol. Again similarly to the regular expressions syntax, the ^ indicates that the string after the equal to sign should be located at the beginning of the value string
|
1 2 3 |
a[href^="https"]{...} |
Selecting an element when it is hovered with the mouse
This is achieved by adding
:hover
to the desired element selector.
Making links red on mouse over (they will be back to the original color on mouse out):
|
1 2 3 |
a:hover{color : red;} |
Many more selection possibilities are available. For a more extended list see this page on the w3schools website.
CSS colors
Color Schemes
Colors are an important part of a website. A good color scheme immediately transmits a message. On building a web site or page, you may want to dedicate some time to selecting an appropriate set of colors for the various elements.
We strongly suggest you choose a limited number of colors (3-6) that go along with each other (a color scheme or palette), and use them consistently all over your site and pages.
If your site has a strong header image or logo, the colors of this image could and should influence the selection of your color scheme.
Used smartly, color can enhance the navigation and the general accessibility of your website contents.
Just an example, to underline the concept:
You could choose a color for internal links and one for external links. Associate these colors to a link class in the css:
|
1 2 3 4 |
a.internal {color : green;} a.external {color : blue;} |
And then assign the correct class to links each time:
|
1 2 3 4 5 |
<a class="internal" href="/">Home page</a> <a class="external" href="http://www.ncbi.nlm.nih.gov/">NCBI</a> |
As in this example, it can sometimes be a good idea to associate a particular color to a defined “function” (loosely defined) of the website, so that visitors can rely on colored visual clues for moving in the website and performing actions.
If you are artistically inclined, you can probably come up with your own original, custom color scheme. If not, then we strongly advise you to rely on the assistance of experts, instead of doing by yourself: you can find great, professional color schemes online, for free. Several websites exists that focus on this. Here are a few:
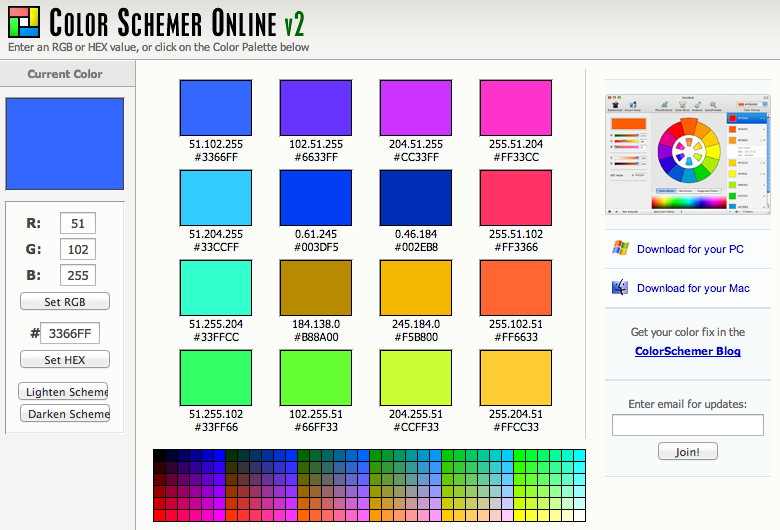
A precious feature of the Color Schemer Online web site is that you can start from your own color (you can input this in the upper-left box of the web site), and color schemer will output a number of other colors that go along with our input color.
Allows to select the number of output colors. Very dynamic and interactive, an excellent resource.
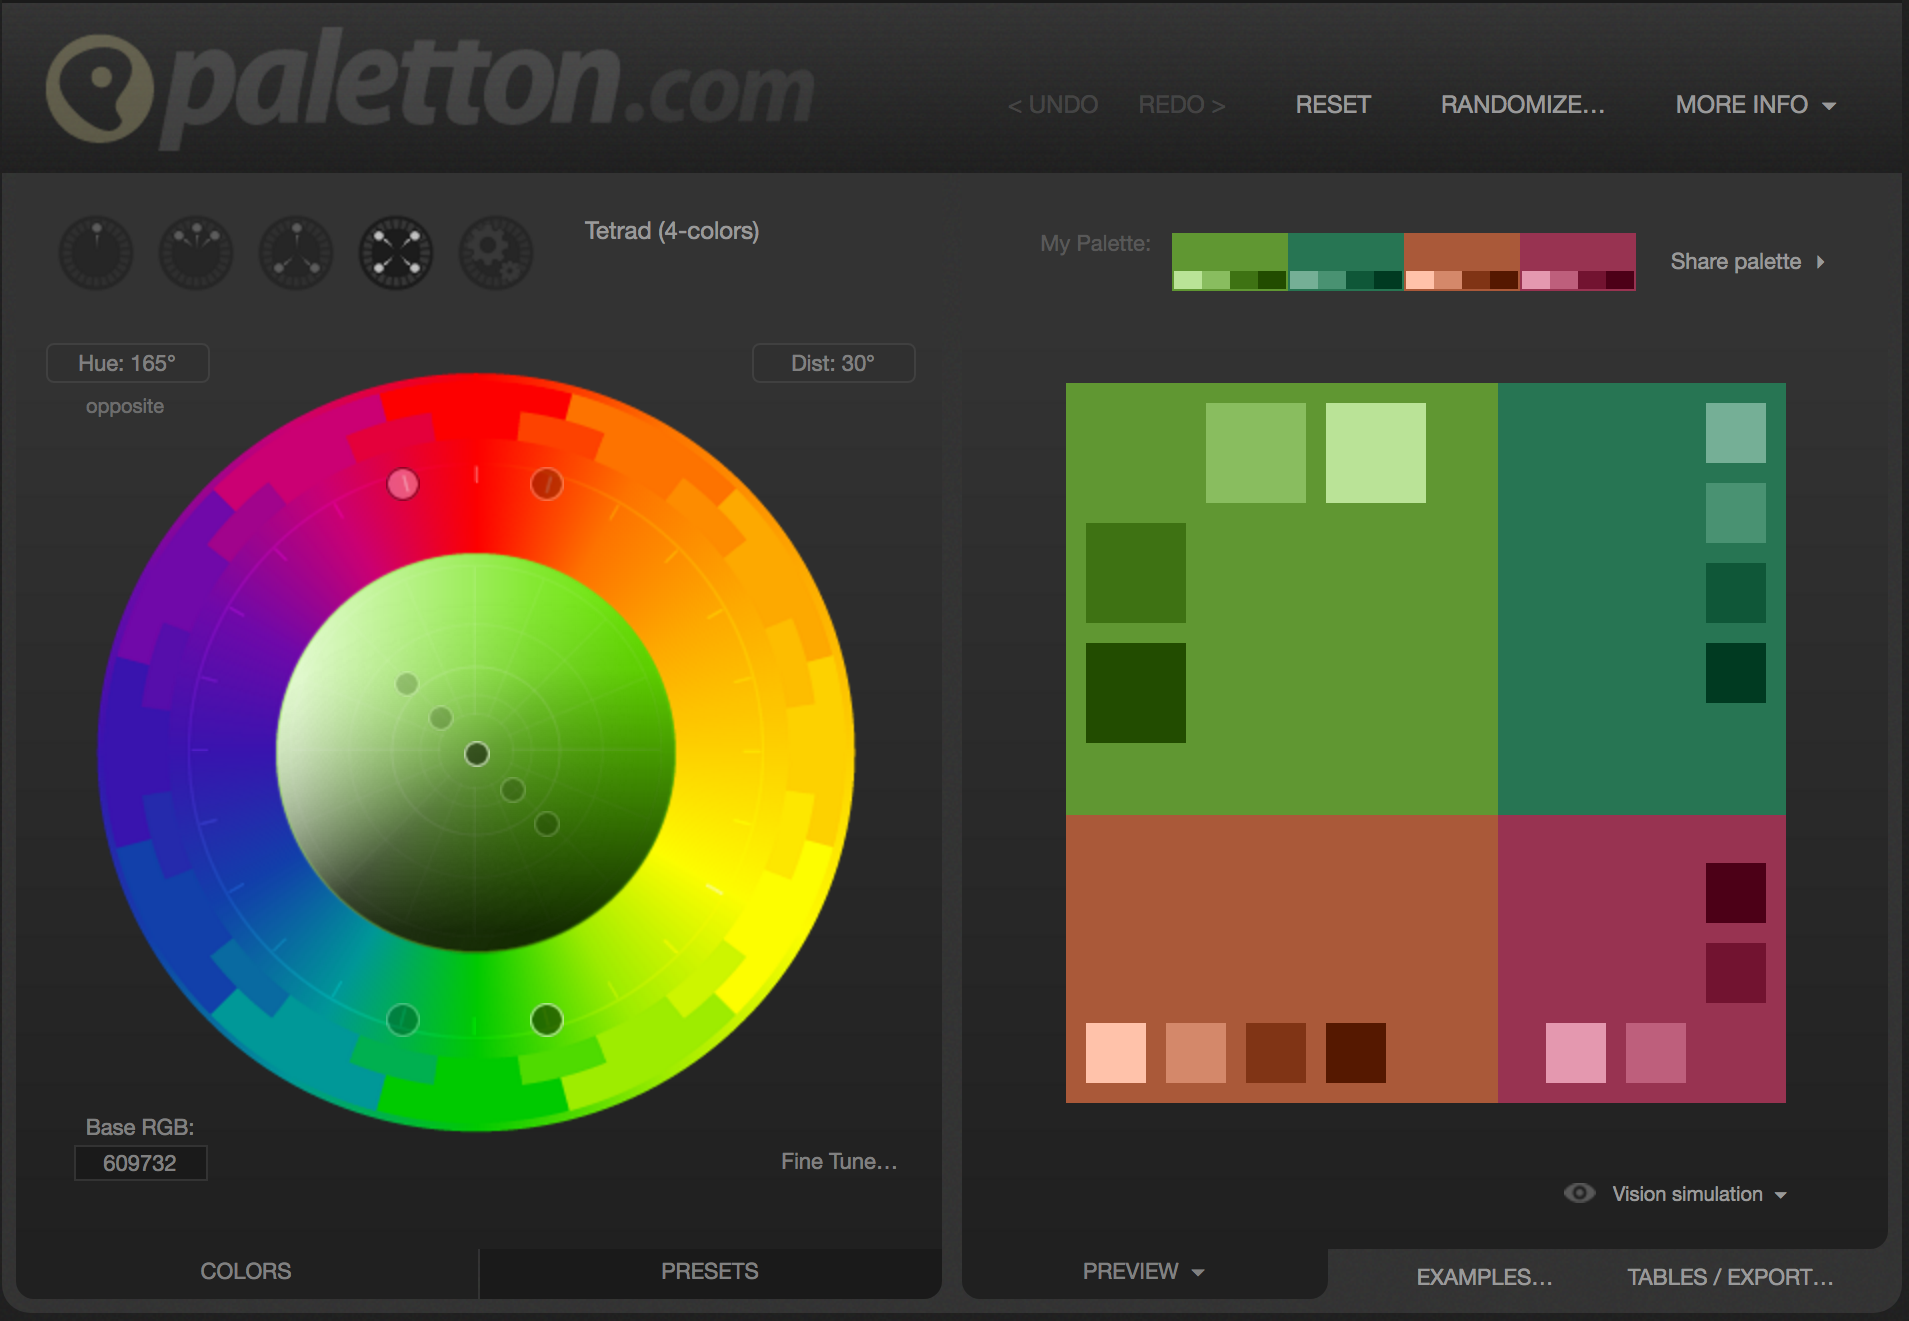
Various colors ideas, thousands of pre-made palettes.
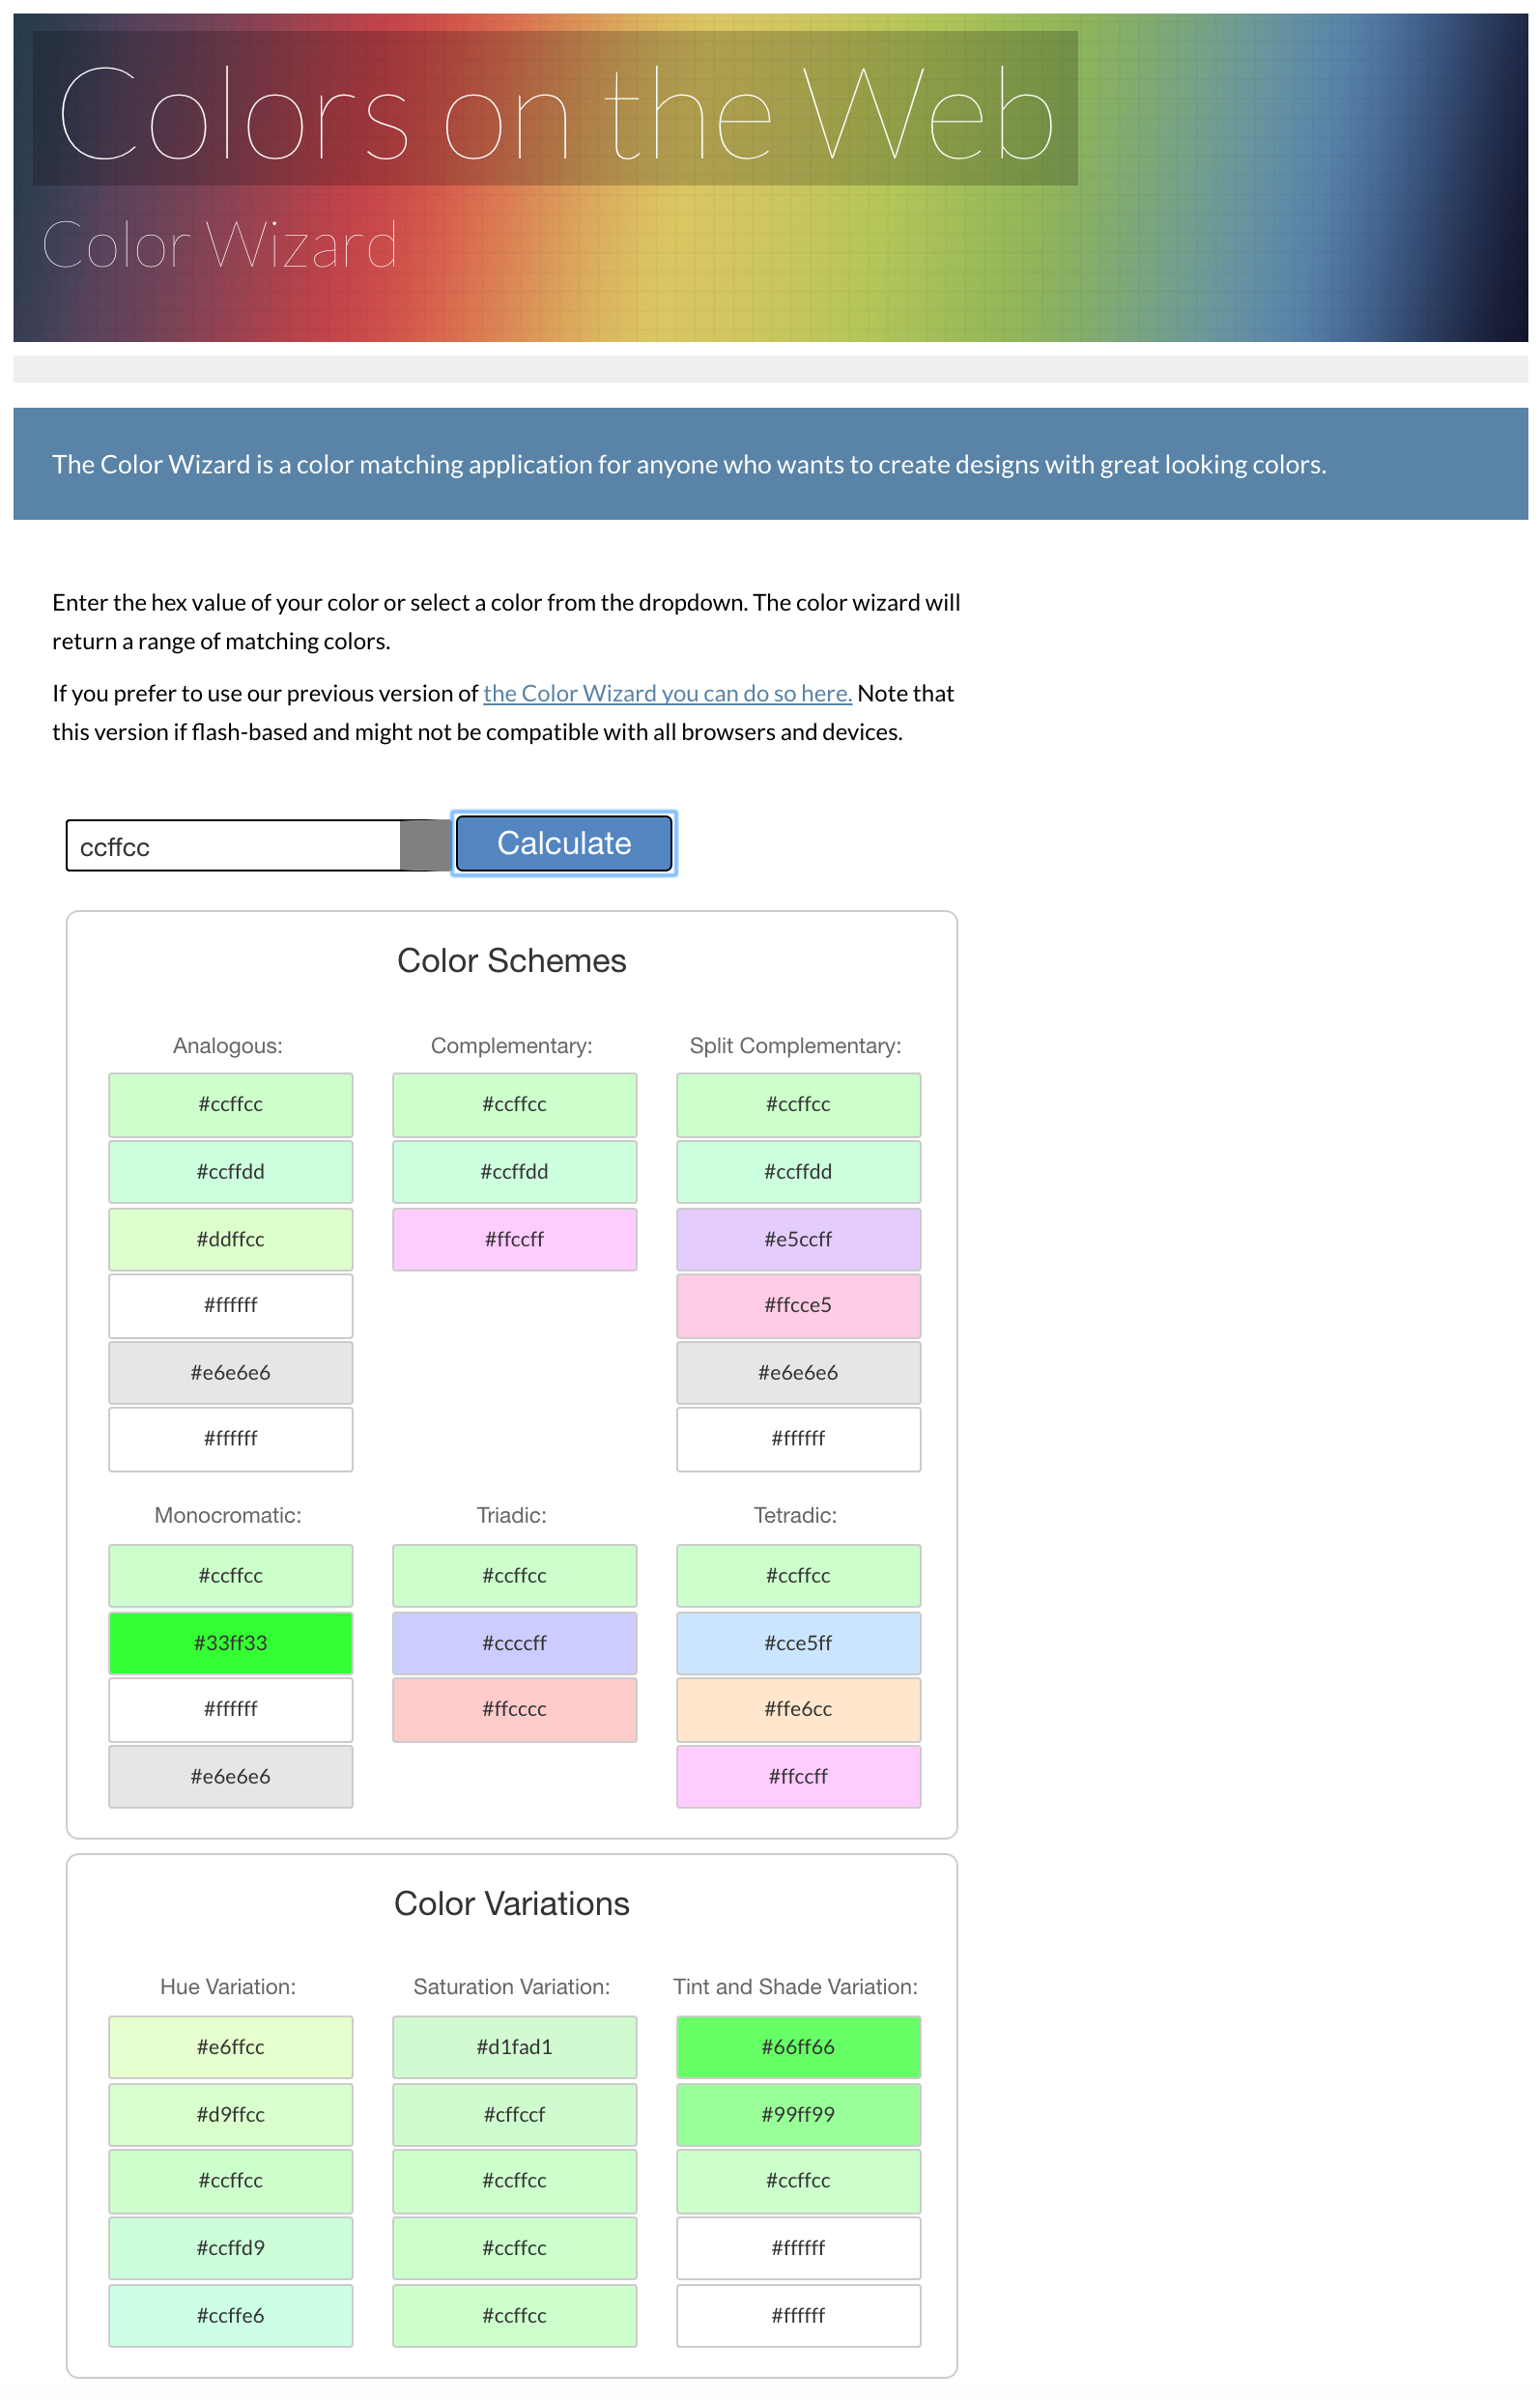
Enter a starting color value and get a generous matching palette
There are many other color resources online, we suggest you spend some browsing time on this. Also, pay attention to how sites you like use colors and draw inspiration for your own work. Copying color schemes on the web is totally allowed.
Colors and CSS: plain english, Decimal RGB and Hexadecimal RGB notations
It is fortunate that a number of colors have a plain english name that we can use in our stylesheets.
CSS3 defines a total of 147 colors names, find the complete list here:
The beginning of this colors table is shown in the next figure.

Another nicely presented and exhaustive colors listing can be found here.
Some names are very easy to remember: blue, red, grey, darkgrey, lightgrey, navy etc.., other need some study.
Syntax could’t be easier:
|
1 2 3 4 5 |
a { color : red; } |
Using names is obviously easy, a good idea. However, there are several circumstances that can make the use of names unpractical.
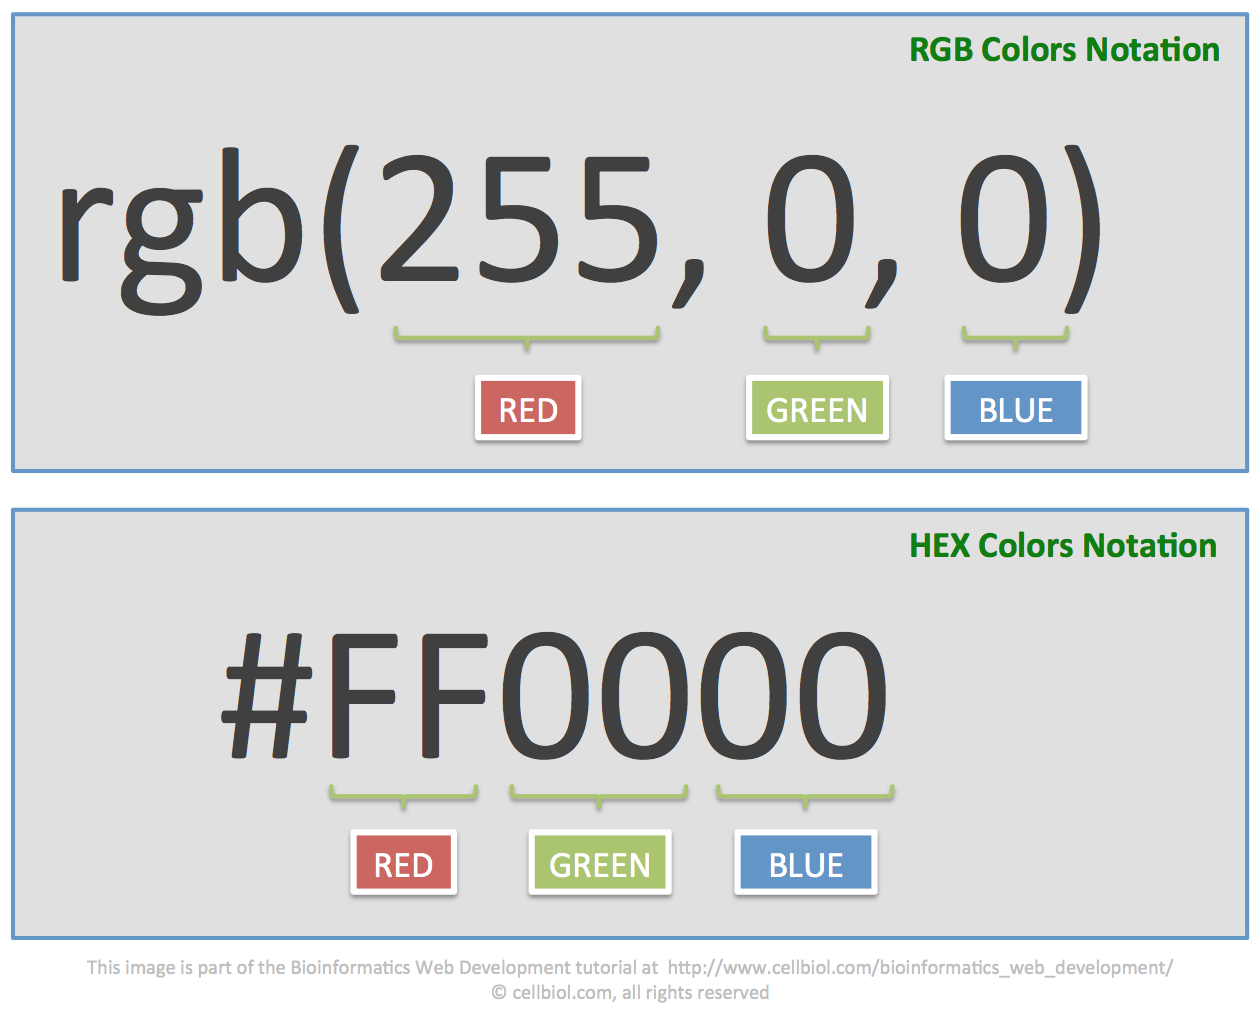
The classical notation for colors is Decimal RGB, Red Green Blue. In decimal RGB, a color is expressed by 3 numbers that indicate the relative amount of Red, Green and Blue components, on a scale from 0 to 255, that mixed together will yield the desired color. For example the name “red” corresponds to pure red: 100% red (255), 0% green (0), 0% blue (0):
|
1 2 3 4 5 |
a { color : rgb(255, 0, 0); } |
However, the notation most currently used in CSS and web code in general is the Hexadecimal RGB notation or HEX RGB.
This expresses the very same information as the decimal RGB notation, however the R G and B numbers are converted to hexadecimal and the format is slightly different:
|
1 2 3 4 5 |
a { color : #FF0000; } |
The notation comprises 6 characters preceded by a #. The 6 characters are the Red (first 2 chars), Green (chars 3 and 4) and Blue (chars 5 and 6) amounts expressed in hex notation instead of decimal numbers as in RGB.
When the characters of an HEX color are repeated in the RGB couples, the notation can be abbreviated to just 3 characters.
Here are some examples:
- #FF0000 can be written as #F00
- #EEEEEE can be written as #EEE
- #FF00EE can be written as #F0E
It is recommended, as a good practice, to use those abbreviations whenever the color code allows it.
Mind that the case of the letters does not matter, #FF0000 is the same as #ff0000. As we usually recommend in case there is a neutral choice to be made, we suggest you choose the style that you like most and then stick to it and be consistent, rather than mixing the 2 possibilities at random. This will make your code ways more professional and easier to read and to be re-used by others, which is a value not to be underestimated in your professional career ref). In our experience, the upper case notation is more common, also in websites that indicate codes for color schemes, online converters etc.., so you might want to pickup the uppercase style. Freedom is a beautiful thing, though.
You can easily:
CSS3 and color transparency
CSS3 have introduced three new ways of coding colors. **RGBA** is like RGB, with an added fourth value for the alpha transparency. Values for this fourth number range from 1 (no transparency), to 0 (full transparency). For example, in RGBA, a 50% transparent white will be expressed as:
rgba (255,255,255,0.5)
The other two ways to indicate colors in CSS3 are HSL (Hue Saturation Lightness) and HSLA, which allows transparency as the fourth value, as it happens for RGBA.
We will skip discussion about HSL and HSAL here, but we recommend you play a bit with the nice HSL Color Picker by Brandon Mathis, and read more about the colors topic on the W3 Schools website and the colorsontheweb.com website.
You should be aware that RGBA, HSL and HSLA are supported by Internet Explorer from version 9 up, previous versions do not support these formats and will just ignore the declarations. They are however supported by all the latest version of current browsers. Check it out on the caniuseit.com web site for what will work (or not) on which browser brand or version.
Equipped with this basic knowledge about the inner workings of CSS we can proceed to the next section, where we will have a quick look at some semantics elements introduced in HTML5, before actually moving to the styling of a sample HTML5 page in the subsequent section.
Chapter Sections
[pagelist include=”135″]
[siblings]